Creating an Offset Wall
Here is an issue we have not looked at in a long time, brought up again by the following query:
Question: I am creating a tool to generate a BIM from CAD data.
One of the steps involves generating a floor slab, and then placing exterior walls along its edge.
The tool begins by using model lines and arcs as a profile to generate the floor.
Unfortunately, that generates walls that resting half on and half off the slab:
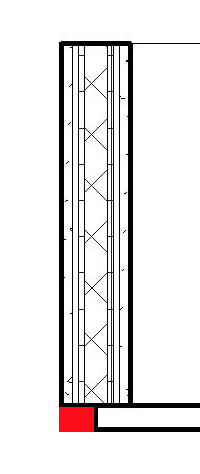
How can I fix this, please?
Answer: The wall creation will always be based on the wall centre line.
After creating the wall, you can adjust the wall's "Location Line" parameter to one of the following options:
- Wall Centerline
- Core Centerline
- Finish Face: Exterior
- Finish Face: Interior
- Core Face: Exterior
- Core Face: Interior
Then the wall will align according to the location line you specified.
In this way, the wall exterior face can be aligned to the floor profile edge after creating the wall using the floor profile edges.
A little note on how to determine and assign one of the options to the "Location Line" parameter:
Each option is mapped to an integer value. You can determine the specific values by looking them up using the RevitLookup tool after changing the settings back and forth manually in the user interface.
And then set the "Location Line" value.
For example:
  Wall wall = ...

  Parameter param = wall.get_Parameter(
    BuiltInParameter.WALL_KEY_REF_PARAM);

  param.Set(2); // Finish Face: Exterior
  param.Set(1); // Core Centerline
Note that this is an application of the principles we discussed way back in the year 2008, explaining the old wall compound layers and brought up in a comment by Berria on that post:
Question: How can I specify that my walls Line Location are 'Finish Face: Exterior'.
Answer: You need to be very precise with what you mean by wall location line. As mentioned, there is a difference between the wall.Location line that you see in the API and the 'Location Line' visible in the user interface. The former cannot be changed, it is always in the middle of the wall. The position of the latter can be adjusted using the WALL_KEY_REF_PARAM parameter.
A bit later, Mike posted a similar query on creating a wall with a sloped profile:
Question: I am struggling to figure out how to set a wall's 'Location Line' to 'Finish Face: Interior' in code prior to drawing the wall. I would like the interior face of the wall to be at the coordinate points I supply instead of the default 'Wall Centerline'.
Answer: You can explore this as follows:
Create a new wall and look at its parameters, e.g. using RevitLookup or the Revit API Introduction labs built-in parameter checker. One of the parameters is
- WALL_KEY_REF_PARAM – Location Line – int read-write
It has an initial value of zero. Looking at the wall properties in the user interface, I see that the location line property is set to centre line. If I manually change the property to 'Finish Face: Interior' and then look at the parameter again, its value has now changed to 3.
You can invert this process, i.e. set the built-in parameter WALL_KEY_REF_PARAM to have a value of 3 through the API, which corresponds to 'Finish Face: Interior'.