Elbow Fitting Selection and Dimensioning
Vacation time is approaching fast for me and lots of things need finishing off beforehand.
Meanwhile, one thing that had a number of developers champing at their bits for a while now finally came to fruition:
Autodesk Exchange Store
The Autodesk Exchange store is now open for application submissions. Stephen Preston already published several articles exaplaining the full details:
Here is another topic that recently kept me busy, with some helpful input from Martin Schmid and Steve Mycynek:
Selecting a Pipe Elbow Fitting
Question: I need to set the diameter of a pipe elbow fitting programmatically. The elbow diameter obviously needs to be adapted to the pipe diameter. The two pipes may also have different diameters.
I tried using the NewElbowFitting method to insert the elbow and simply pass in the two pipe connectors to it like this:
doc.Create.NewElbowFitting( con1, con2 );
This does successfully create an elbow fitting instance. However, I don't see how to control which elbow symbol is inserted by this method. Is there any way to influence this?
Answer: Calling the NewElbowFitting method is similar to using the Trim tool in the user interface. When this method is called, Revit automatically chooses the appropriate elbow for you.
In Revit 2013, you can control the selection process through the routing preferences, whereas previous versions only enabled you to define one single default elbow, tee, etc. The routing preferences support multiple settings for different materials and sizes.
The routing preferences API is demonstrated by the RoutingPreferenceTools SDK sample. It implements three commands, one for analysis and reporting purposes, two for importing and exporting routing preferences to XML:
- Routing Preference Analysis: Analyze the routing preferences of a given pipe type to check for common problems, using the routing preferences API to look at all rules and criteria for a given PipeType.
- Routing Preference Builder with its two commands CommandReadPreferences and CommandWritePreferences: Set pipe type, fitting, and routing preferences in a project from data in an XML file and export these preferences to XML for archival, documentation, and collaboration purposes, allowing a user to work with routing preference data in a shareable XML format suitable for reuse in a wide variety of BIM management environments.
When you call NewElbowFitting, it inspects the pipe type and finds the first elbow in the appropriate routing preferences.
If the elbow inlet and outlet sizes differ, you need a reducing elbow.
How to Use the Routing Preferences API to Set the Elbow Symbol
The NewElbowFitting method will insert the elbow symbol specified in the routing preferences. Please note that while RP will choose the first symbol in the rule list that matches its criteria, you can always programmatically either set size criteria to ensure a later symbol is chosen for a given scenario, or re-order the rules using RoutingPreferenceManager RemoveRule and AddRule methods, at least temporarily, to force RP to choose a different elbow symbol than normal.
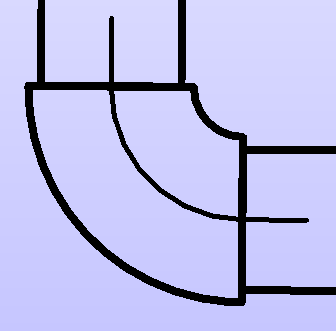
For example, if you have defined routing preference for 'Elbow Reducing - Threaded - MI - Class 150.rfa' and call this method, you will get an elbow that has different connection sizes as shown below on the left. If you don't have a transitioning elbow, but you do have a reducer defined, you will get a result as below right. Note that the reducer is quite odd in this particular model file :-)
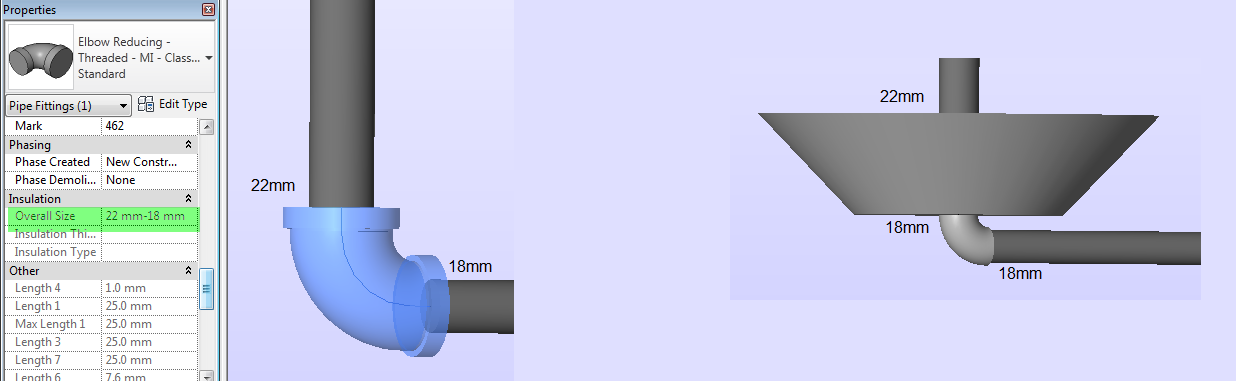
In this case, both the Reducing Elbow and the Elbow + Reducer 'work'; which is used depends on their order in the definition of the RP.
The RP is the only way to influence this selection, both in the UI and in the API.
I Beg to Differ
In some cases, the outer diameter of the fitting and the pipes may differ. This is a content issue. Pipes and fittings are selected and connected based on the pipe 'Nominal Diameter' and the 'Nominal Diameter' of the fitting connector. In the Pipe Settings, a user can make the 'outer diameter' of a pipe bigger or smaller than its nominal diameter.
Here is an example with the following pipe type properties:
- Diameter 18 mm
- Outer Diameter 18 mm
- Inner Diameter 16 mm
- Size 18 mm
The generic pipe elbow fitting connected to the pipes by calling the NewElbowFitting method has the following properties:
- Nominal Diameter 18 mm
- Size 18 mm - 18 mm
For a fitting, the geometry of the elbow is completely arbitrary.
If you would like the elbow and pipe to have the same outer diameter, there are two ways to achieve this:
- Make the outer diameter of the pipes bigger.
- Modify the geometry of the elbow to be smaller.
Welded pipe fittings, for example, would have the same outer diameter, whereas threaded fittings, PVC, and others, typically have a larger outer diameter than the pipe itself, because the pipe engages into the fitting.
Change Elbow Dimension
Saikat handled an independent but related case that also happened to catch my attention:
Question: How can I change the diameter of an elbow pipe fitting, depending on the pipe diameter?
Answer by Saikat Bhattacharya: To test this, I created a pipe with an elbow fitting attached at one end. In the user interface, you can see that the nominal diameter parameter of the pipe is disabled, i.e. greyed out. The only thing I can do interactively in the user interface is modify the Nominal Radius of the pipe.
Based on this observation, I wrote the following few lines of code to modify the Nominal Radius of the selected elbow fitting using the API and it worked well:
  UIApplication uiApp = commandData.Application;
  UIDocument uiDoc = uiApp.ActiveUIDocument;
  Document doc = uiDoc.Document;

  Transaction trans = new Transaction( doc );
  trans.Start( "Change Diameter" );
  foreach( Element e in uiDoc.Selection.Elements )
  {
    FamilyInstance i = e as FamilyInstance;

    Parameter p = i.get_Parameter(
      "Nominal Radius" );

    p.Set( 10 * 0.08333 );
  }
  trans.Commit();
For the complete solution and additional background information, please refer to Saikat's article on changing the diameter of an elbow fitting.
Invoke External Command on Start-up
Finally, to wrap this up, a little note on another issue that also cropped up and really is completely unrelated :-)
Question: I would like to call my Revit add-in in a batch operation in order to process multiple Revit files. The process would involve starting Revit, loading a model, invoking my add-in, and shutting down the application afterwards. I don't see any obvious command line option to achieve this. Is it possible at all?
Answer: Yes. This can be easily addressed by creating an external application, implementing appropriate OnStartup and DocumentOpened events, and driving the whole thing through a journal file or even directly from the command line. ← Back to Index