Failure API Take Two
Before I get into today's topic, let me lament a bit about my Wednesday morning.
Travel Woes
I am flying to Las Vegas today in order to have time for last-minute AU preparations and acclimatise properly there. For reasons unknown to me, my travel agent (who shall remain unnamed here in public) booked me a flight leaving at seven in the morning from Switzerland to London, and a continuation from London to Las Vegas with an eight hour wait in between. I have a brother in London, so we arranged to meet, making the wait quite a tolerable affair.
Be that as it may, I tried to check in online to my British Airways flight yesterday morning. The system asked me to enter all my data, which took ten or fifteen minutes the first time around, then went ahead and processed my entry for a while, only to return with an error message saying something went wrong, and please to try later. So I did. Three times, in fact, with a couple of hours in between each attempt, to no avail. Rather frustrating, of course, since I had to re-enter all my data for each attempt. Snafu...
This morning at the airport, I checked in, everything seemed in order, but there was a problem in the very last step, printing the boarding pass. It turned out to be the US ESTA. Since i visited the US in June and the ESTA is valid for two years, I assumed that would not be a problem. I updated my passport in the meantime, though, and now I apparently need a new ESTA. Snafu...
They asked me to go to an Internet point next door and reapply for the new ESTA, which I did. The machine accepted coins only; I bought ten minutes of time, filled in the form, everything complete, and reached the validation step just before the ten minutes were up. The machine would not accept my next coin. Result: start again from scratch. Snafu...
The second time around I was much faster, completed the form in five minutes, and was told by the system that I could either pay immediately or within seven days' time. I was in deep stress by now, afraid of missing my flight, so I thought "ok, I'll do it when I arrive, within seven days", and went back to check in. Same problem. Apparently, payment is required within seven days, but also before departure. And the latter was not mentioned. By now, of course, the flight was closed. Snafu...
The next step in the list of bungles is the fact that my unnamed travel agent had booked me on this early flight at seven in the morning, with the continuation three in the afternoon. I wonder why they did that? Anyway, it turns out there is another flight at lunch time that serves just as well, and I am now rebooked for that. And successfully checked in as well, I am pleased to say.
BA was kind enough to let me enter the lounge, which provides Internet access, so I can went my frustration here. Thank you for that, at least.
Summary:
- The British Airways online check-in system should have told me what the problem was.
- I should have thought of checking my ESTA validity.
- The Internet machine should have accepted my second coin.
- The ESTA processing form should have said payment is required before departure.
- The travel agent should have booked the later flight; really, I wonder why they did not?
- Thank God they didn't!
Anyway, I think I can leave that topic now, to return to the Revit API. I already gave a brief introduction to the Revit 2011 Failure API and the ErrorHandling SDK Sample which demonstrates its use.
By the way, maybe the story above just illustrates my real-world failure API taking control of the snafu?
One of the most common uses of this API is to disable undesired warning and error messages. Previously, one way to achieve this was to use an older and simpler approach based on the DialogBoxShowing event. The Failure API provides a much more powerful and complete solution, as we showed in the discussions on editing elements inside groups and suppressing an unwanted dialogue.
Now Joe Ye of Autodesk Beijing wrote the following more extensive introduction to the Failure API, including several interesting examples:
Failure Posting and Handling API
Revit posts failure messages which may report either a warning or an error when there are issues in the model. For example, when two walls partially overlap, Revit displays the following warning message:
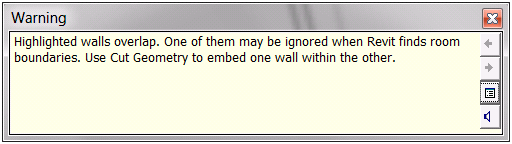
Revit 2011 exposes the Failure API for posting and handling these kinds of failures. Failure posting APIs can be used to define and register new custom failures. Custom failures can be posted in your own plug-ins. Failure handling APIs can delete or resolve Revit failures when an operation on the model has been submitted. You can do something to the model during the handling process. If failures are handled by the failure handling API, users might not see the warning or error dialogs at all as if everything goes well. In fact, these failures are handled by your application.
Failure Posting
The failure posting API is easy to use. A new failure definition can be registered in the OnStartup method of an external application, and then the failure severity and resolution type can be set. Here is the code showing the registration of a warning. Once custom failings have been registered, they can be posted in your program. Here is a code fragment to register a custom failure:
public Result OnStartup( UIControlledApplication a )
{
  // Create failure definition Ids

  m_idWarning = new FailureDefinitionId( new Guid(
    "0C3F66B5-3E26-4d24-A228-7A8358C76D39" ) );

  // Create failure definition and add resolution

  m_fdWarning
    = FailureDefinition.CreateFailureDefinition(
      m_idWarning, FailureSeverity.Warning,
      "I am the warning." );

  m_fdWarning.AddResolutionType(
    FailureResolutionType.MoveElements,
    "MoveElements", typeof( DeleteElements ) );

  return Result.Succeeded;
}
The Document.PostFailure method is used to notify the document of a problem.
Here is a code fragment to post a custom failure:
  transaction.Start();

  FailureMessage fm
    = new FailureMessage( m_idWarning );

  m_doc.PostFailure( fm );

  transaction.Commit();
Failures will be validated and possibly resolved at the end of the transaction.
Failure Handling
Normally posted failures are processed by Revit's standard failure resolution UI at the end of transaction. The user is presented information and options in the UI to deal with the failures. Besides, if operations on the document require some special treatment for certain errors (or even all possible errors), you can customize automatic failure resolution.
Revit may detect failures at the end of any transaction. When it does so, it starts to handle the failures in repeated cycles. Each cycle of failure processing includes three steps:
- Failure pre-processing (IFailuresProcessor)
- Failure processing event (FailureProcessing event)
- Final processing (IFailureProcessor)
These steps are called one by one in a cycle. Each of these three steps can control what happens and whether to continue to the next step by returning different FailureProcessingResults. Corresponding with these three steps, there are two interfaces and an event to implement failure handling. If you know the transaction, IFailuresPreprocessor can be used. To handle all possible errors, you can use the FailuresProcessing event. Finally, the IFailuresProcessor interface offers the ability to completely replace the standard failure processing.
Implement IFailuresPreprocessor interface and its method PreprocessFailures to handle failures. Register and define an event handler to handle all failures. Implement IFailureProcessor interface and its ProcessFailures method to implement final failure handling.
In each step, we can delete elements, delete a warning, and resolve or post a failure. All actions that can be taken are wrapped in the FailuresAccessor class.
Handling a Warning
Here is a sample showing how to handle a warning posted by deleting the last instance of a linked Revit model. The following warning message is displayed to the user if no failure handling mechanism has been added:
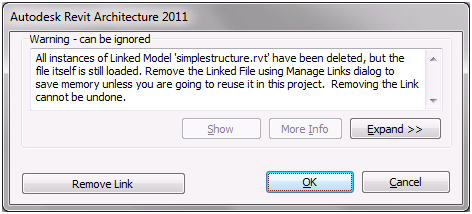
Revit users can manually click one of the three buttons to respond to the warning and dismiss the dialog. Instead, we will use failure handling APIs to mimic the manual click. First we use an event to handle the warning.
You can define the event handler and register to the FailuresProcessing event in an external command like this:
public class RegisterFailureEvent : IExternalCommand
{
  public Result Execute(
    ExternalCommandData commandData,
    ref string messages,
    ElementSet elements )
  {
    UIApplication app = commandData.Application;
    Document doc = app.ActiveUIDocument.Document;

    app.Application.FailuresProcessing
      += new EventHandler<FailuresProcessingEventArgs>(
        OnFailuresProcessing );

    return Result.Succeeded;
  }

  /// <summary>
  /// Define event handler.
  /// </summary>
  private void OnFailuresProcessing(
    object sender,
    FailuresProcessingEventArgs e )
  {
    FailuresAccessor failuresAccessor
      = e.GetFailuresAccessor();

    String transactionName
      = failuresAccessor.GetTransactionName();

    IList<FailureMessageAccessor> fmas
      = failuresAccessor.GetFailureMessages();

    if( fmas.Count == 0 )
    {
      // FailureProcessingResult.Continue is to let
      // the failure cycle continue next step.

      e.SetProcessingResult(
        FailureProcessingResult.Continue );

      return;
    }

    // If manually delete an element, the
    // transaction name is 'Delete Selection'
    // if the failure is caused by deleting element.

    if( transactionName.Equals( "Delete Selection" ) )
    {
      foreach( FailureMessageAccessor fma in fmas )
      {
        // the following line mimics clicking the
        // 'Remove Link' button to resolve
        // the failure.

        failuresAccessor.ResolveFailure( fma );

        // the following line mimics clicking the
        // 'Ok' button by just deleting the warning.

        //failuresAccessor.DeleteWarning(fma);
      }
      e.SetProcessingResult(
        FailureProcessingResult.ProceedWithCommit );

      return;
    }

    e.SetProcessingResult( FailureProcessingResult.Continue );
  }
}
The code in the event handler above shows two options to handle the warning. The uncommented one resolves the warning, so that both the linked model and the linked file are removed. If you comment the line saying 'failuresAccessor.ResolveFailure(fma)' and uncomment the 'failuresAccessor.DeleteWarning(fma)' one, the linked model is removed and the linked file remains.
Steps to use the failure handling above:
- Build the code in a project, and create an add-in manifest file to load it into Revit.
- Start Revit and create a new document.
- Run the external command to register the event handler.
- In the current Revit document, import a Revit model.
- Delete the linked model using Revit's 'Delete' command.
- You will see the expected result.
Pre-processing a Warning
Now we will talk about how to pre-process warning. To use the IFailuresPreprocessor interface to handle failures, we need to register the interface derived class to transaction. Then the derived interface class will be triggered when the failure is posted.
[TransactionAttribute( TransactionMode.Manual )]
[RegenerationAttribute( RegenerationOption.Manual )]
public class FailureHandle : IExternalCommand
{
  public Result Execute(
    ExternalCommandData commandData,
    ref string messages,
    ElementSet elements )
  {
    UIApplication app = commandData.Application;
    Document doc = app.ActiveUIDocument.Document;

    Transaction trans = new Transaction(
      doc, "DeleteLinkedModel" );

    trans.Start();

    FailureHandlingOptions options
      = trans.GetFailureHandlingOptions();

    MyPreProcessor preproccessor
      = new MyPreProcessor();

    options.SetFailuresPreprocessor( preproccessor );
    trans.SetFailureHandlingOptions( options );

    Selection sel = app.ActiveUIDocument.Selection;

    Reference ref1 = sel.PickObject( ObjectType.Element,
      "Please pick a linked model instance" );

    Element elem = ref1.Element;

    doc.Delete( elem );

    trans.Commit();

    return Result.Succeeded;
  }
}

/// <summary>
/// Define a failure preprossor to handle failure
/// </summary>
public class MyPreProcessor : IFailuresPreprocessor
{
  FailureProcessingResult
    IFailuresPreprocessor.PreprocessFailures(
      FailuresAccessor failuresAccessor )
  {
    String transactionName
      = failuresAccessor.GetTransactionName();

    IList<FailureMessageAccessor> fmas
      = failuresAccessor.GetFailureMessages();

    if( fmas.Count == 0 )
    {
      return FailureProcessingResult.Continue;
    }

    // We already know the transaction name.

    if( transactionName.Equals( "DeleteLinkedModel" ) )
    {
      foreach( FailureMessageAccessor fma in fmas )
      {
        // ResolveFailure mimics clicking
        // 'Remove Link' button             .

        failuresAccessor.ResolveFailure( fma );

        // DeleteWarning mimics clicking 'Ok' button.
        //failuresAccessor.DeleteWarning( fma );
      }

      return FailureProcessingResult
        .ProceedWithCommit;
    }
    return FailureProcessingResult.Continue;
  }
}
Failure pre-processing can only be used for the failures caused by actions in your transaction. In the sample, we delete the linked model by picking it and then delete it in our transaction. The core code to handle the failure is the same as the event method above.
Further Reading
This article is a general introduction to the failure posting and handing mechanism. More resources are provided in the Revit 2011 SDK. The sample project ErrorHandling shows more Failure API functionality. A detailed description of the Failure API is provided in Chapter 26 of the Developer Guide in the Revit 2011 SDK. For a reference to all relevant classes and methods, please refer to the Revit API help file RevitAPI.chm.
Many thanks to Joe for the useful overview and samples!