Add New Materials from List
I am happily back from Siem Reap in Cambodia and the ruins of Angkor Wat (more photos):


Yesterday I visited the Grand Palace and the reclining Buddha in Wat Pho in Bangkok (more photos):


Angkor Wat and Cambodia was absolutely wonderful, and I am really glad that I went there. The places I visited in Thailand were rather touristy, whereas in Cambodia I had the feeling of getting much more in touch with real people and life:


Before going there I was thinking that I am not really all that interested in this kind of travelling, but the connection that I experienced there really motivated me to return again, and possibly visit Laos as well. One nice idea would be to go for a walk from northern Thailand along the western border of Laos all the way up to China.
Now I am staying with my brother Marcus in Pattaya again, picking up my computer before returning to Switzerland.
So, returning to Revit programming topics after this wonderful break from computers and the heart-warming dive into loving friendliness of Cambodian people...
Importing and Creating New Materials from a List
Quite a while back, I discussed programmatically adding a new material to the Revit project. I would like to present a useful real-world application that takes this much further, created by Jinsol Kim of RCMS GROUP to add an entire list of materials read from an Excel spreadsheet to a Revit project. Here is part of the discussions we had during the development and Jinsol's detailed description of the final process:
Question: I am trying to add some material lists programmatically and running into some problems here. The materials are defined in Excel spreadsheets used as input and containing data such as
- Material Name
- Code
- Title
- Strength
- Graphics
- RGB colour
- Rendering data
- Identity
- Filter criteria
- Descriptive information
- Custom parameters
I found a way to add materials like this:
  string newName = "03 15 00";

  MaterialOther myMaterial
    = doc.Settings.Materials.AddOther(
      newName );

  myMaterial.Color = new Color( 127, 127, 127 );
  myMaterial.Transparency = 0;
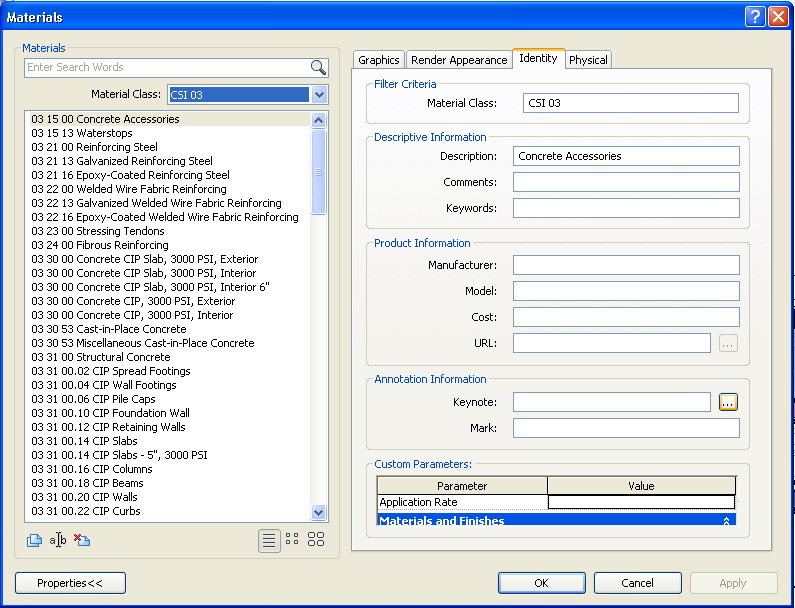
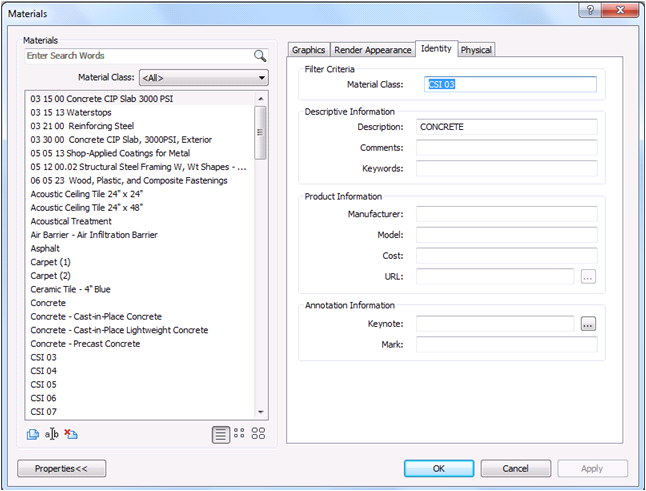
However, I cannot find out any parameters related to 'Identity'. In order to classify the material lists, I need to put values on 'Material Class'. How can I access that value, i.e. Materials > Identity > Material Class (Filter Criteria)?
Answer: As said, we did discuss adding a new material quite a while back.
For the identity fields, you could simply add your own shared parameters to the model.
Using shared parameters, you can add arbitrary data to all elements of any category.
Question: One more thing: If I create a shared parameter named 'Material Class' for example under the Materials and finishes group, then there seems to be no way for users to use the Material Class filter. Using the API, I will add up to about 2000 materials at once to avoid typing in every material in each project. Users might want to see only specific materials which belong to specific material class by filtering them out with material class. If the material class doesn't support filter by material class, then do you think I need to create a custom filter separately for it?
Here are the expected results, although created manually in this case:
Answer: That looks a bit similar to the view filter, for which there is full API access as demonstrated by the ElementFilter/ViewFilters sample. Unfortunately, it looks to me as if the materials filter is not accessible in the same way.
Question: I chose another way to solve how to maintain the material class name in the identity data of Materials.
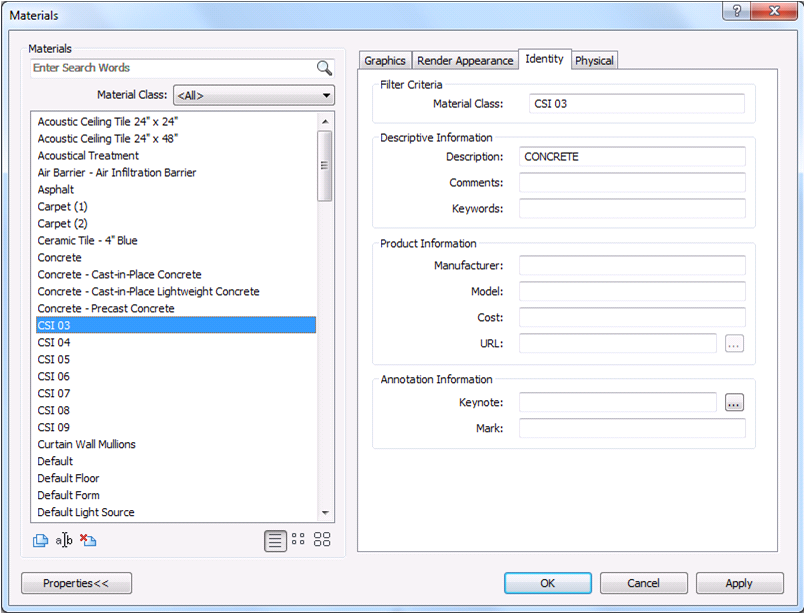
First, I created a set of root materials manually with the proper Material Class and then duplicated them accordingly to appropriate master format division.
Here is a more detailed description:
Step 1: Set up the basic materials manually within the project file to duplicate with 'Material Class'.
Note: The Material Class name should follow this format: 'CSI XX'.
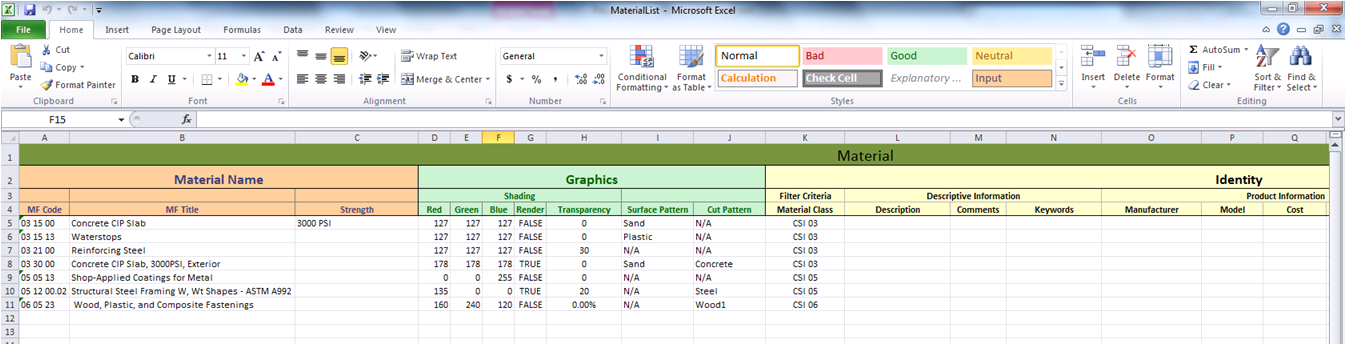
Step 2: Check all the material information in defined in the right format.
The input spreadsheet is read from C:\RevitAPI\MaterialList.xlsx.
Note 1: Graphics section doesn't allow an empty space. It should be filled with '0' or N/A.
Note 2: Material Class values should be equivalent to basic material class that will be used for duplication.
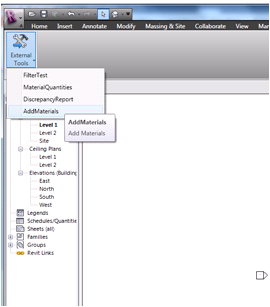
Step 3: Run the add-in and check that the materials were added successfully.
Here is Jinsol's original Powerpoint version of the detailed description, and here is AddMaterials01.zip containing the complete Visual Studio solution and source code of the AddMaterials Revit add-in.
Thank you very much, Jinsol, for creating this solution and documenting and sharing it with us!
Addendum: This utility has been updated. Please check out the migration to Revit 2014 and the enhancements in release 2014.0.0.1.