Display Webcam Image on Building Element Face
We are now ready to implement RevitWebcam, making use of the webcam image grabber that I presented yesterday.
As I explained, the idea is to make use of the new Revit API Idling event which allows semi-asynchronous access to the Revit API.
In order to display the webcam image updating itself in real-time on a Revit building element face, I implement the following steps:
- Select a face on a BIM element.
- Set up a spatial field primitive for it.
- Set the analysis display style.
- Subscribe to the Idling event.
- Handle the Idling event.
The first item is standard selection handling, and a suitable Revit SDK sample demonstrating that is the aptly named Selections sample. The second and third items have more to do with the analysis visualisation framework than the Idling event handling, and I based the code I wrote to implement them on the Revit SDK AVF samples DistanceToSurfaces and SpatialFieldGradient.
Select a Face on a BIM Element
In order to select the face, we make use of the new picking facilities and set up a filter to allow the user to only select faces, and only on building elements. The method that I use to check whether an element is in fact a building element and not part of the annotation or something else is to check whether it has a valid category and its category contributes material to the building model. The call to select the element face and store it in a global variable _faceReference looks like this:
  Reference r = uidoc.Selection.PickObject(
    ObjectType.Face,
    new BimElementFilter(),
    _prompt );

  _faceReference = r;
It makes use of the following selection filter:
class BimElementFilter : ISelectionFilter
{
  public bool AllowElement( Element e )
  {
    return null != e.Category
      && e.Category.HasMaterialQuantities;
  }

  public bool AllowReference( Reference r, XYZ p )
  {
    return true;
  }
}
Set a Spatial Field Primitive for a Face on a BIM Element
To display analysis results on the selected face requires us to set up a spatial field primitive for it. Spatial field primitives are handled by the SpatialFieldManager class, which uses integer indices to keep track of them. In order to update the correct primitive later on, we store it in a global variable _sfp_index. Here is the code to access the manager and set up the primitive:
  SpatialFieldManager sfm
    = SpatialFieldManager.GetSpatialFieldManager(
      view );

  if( null != sfm && 0 < _sfp_index )
  {
    sfm.RemoveSpatialFieldPrimitive(
      _sfp_index );

    _sfp_index = -1;
  }
Set the Analysis Display Style
I set up an analysis display style in order to turn off the gridlines and define a black and white colour range suitable for the greyscale image I retrieve from the webcam. The code to do so is based on the SpatialFieldGradient SDK sample and looks like this:
void SetAnalysisDisplayStyle( Document doc )
{
  AnalysisDisplayStyle analysisDisplayStyle;

  const string styleName
    = "Revit Webcam Display Style";

  // extract existing display styles with specific name

  FilteredElementCollector a
    = new FilteredElementCollector( doc );

  IList<Element> elements = a
    .OfClass( typeof( AnalysisDisplayStyle ) )
    .Where( x => x.Name.Equals( styleName ) )
    .Cast<Element>()
    .ToList();

  if( 0 < elements.Count )
  {
    // use the existing display style

    analysisDisplayStyle = elements[0]
      as AnalysisDisplayStyle;
  }
  else
  {
    // create new display style:

    // coloured surface settings:

    AnalysisDisplayColoredSurfaceSettings
      coloredSurfaceSettings
        = new AnalysisDisplayColoredSurfaceSettings();

    coloredSurfaceSettings.ShowGridLines = false;

    // color settings:

    AnalysisDisplayColorSettings colorSettings
      = new AnalysisDisplayColorSettings();

    colorSettings.MaxColor = new Color( 255, 255, 255 );
    colorSettings.MinColor = new Color( 0, 0, 0 );

    // legend settings:

    AnalysisDisplayLegendSettings legendSettings
      = new AnalysisDisplayLegendSettings();

    legendSettings.NumberOfSteps = 10;
    legendSettings.Rounding = 0.05;
    legendSettings.ShowDataDescription = false;
    legendSettings.ShowLegend = true;

    // extract legend text:

    a = new FilteredElementCollector( doc );

    elements = a
      .OfClass( typeof( TextNoteType ) )
      .Where( x => x.Name == "LegendText" )
      .Cast<Element>()
      .ToList();

    if( 0 < elements.Count )
    {
      // if LegendText exists, use it for this display style

      TextNoteType textType = elements[0] as TextNoteType;

      legendSettings.SetTextTypeId( textType.Id, doc );
    }

    // create the analysis display style:

    analysisDisplayStyle = AnalysisDisplayStyle
      .CreateAnalysisDisplayStyle(
        doc, styleName, coloredSurfaceSettings,
        colorSettings, legendSettings );
  }

  // assign the display style to the active view

  doc.ActiveView.AnalysisDisplayStyleId
    = analysisDisplayStyle.Id;
}
Subscribe to the Idling Event
Now we get to the real meat of this discussion, subscribing to the Idling event and implementing the handler to process it.
The actual subscription process is a one-liner:
  uiapp.Idling
    += new EventHandler<IdlingEventArgs>(
      OnIdling );
Handle the Idling Event
The event handler may be called very frequently, as demonstrated by The Building Coder CmdIdling command. Since the webcam image will be updated less frequently, it makes sense to check for updates less frequently than the handler is called, i.e. skip the majority of the calls. I do so by defining a minimum elapsed time interval, and simply returning immediately from the handler if it has not yet passed since the last update.
If the minimum time interval is up, I grab the current image from URL. There is still no guarantee that it has changed, so before starting a transaction and making any changes to the Revit model, I compare the current image with the last one displayed. The comparison is rather simplistic, based on a SHA256Managed hash value calculated from the image pixel data like this:
public byte [] HashValue
{
  get
  {
    // convert image to a byte array

    ImageConverter ic = new ImageConverter();

    byte[] bytes = ( byte[] ) ic.ConvertTo(
      _bitmap, typeof( byte[] ) );

    // compute a hash for image

    SHA256Managed shaM = new SHA256Managed();
    return shaM.ComputeHash( bytes );
  }
}
If an update is deemed necessary, a transaction is started, the spatial field primitive is set up for the face, and the field points and values to display the image data are calculated and applied.
Here is the code to calculate the points and values for a given face and greyscale bitmap data:
static void GetFieldPointsAndValues(
  ref IList<UV> pts,
  ref IList<ValueAtPoint> valuesAtPoints,
  ref GreyscaleBitmapData data,
  Face face )
{
  BoundingBoxUV bb = face.GetBoundingBox();

  double umin = bb.Min.U;
  double umax = bb.Max.U;
  double ustep = ( umax - umin ) / data.Width;
  double u = umin;

  double v = bb.Min.V;
  double vmax = bb.Max.V;
  double vstep = ( vmax - v ) / data.Height;

  List<double> values = new List<double>( 1 );

  for( int y = 0; y < data.Height; ++y, v += vstep )
  {
    Debug.Assert( v < vmax,
      "expected v to remain within bounds" );

    u = umin;

    for( int x = 0; x < data.Width; ++x, u += ustep )
    {
      Debug.Assert( u < umax,
        "expected u to remain within bounds" );

      double brightness = data.GetBrightnessAt(
        x, y );

      UV uv = new UV( u, v );
      pts.Add( uv );

      values.Clear();
      values.Add( brightness );
      valuesAtPoints.Add( new ValueAtPoint(
        values ) );
    }
  }
}
To summarise, the event handler thus needs to perform the following steps:
- Check minimum elapsed time interval.
- Grab current image from URL.
- Check whether an update is required.
- Start transaction for write access.
- Set up spatial field primitive.
- Calculate field points and values from the image data.
- Update the spatial field primitive.
Here is the actual code implementing these steps:
static void OnIdling(
  object sender,
  IdlingEventArgs e )
{
  if( DateTime.Now.Subtract( _lastUpdate )
    > _interval )
  {
    Log( "OnIdling" );

    GreyscaleBitmapData data
      = new GreyscaleBitmapData(
        _width, _height, _url );

    byte[] hash = data.HashValue;

    if( null == _lastHash
      || 0 != CompareBytes( hash, _lastHash ) )
    {
      _lastHash = hash;

      // access active document from sender:

      Application app = sender as Application;

      Debug.Assert( null != app,
        "expected a valid Revit application instance" );

      UIApplication uiapp = new UIApplication( app );
      UIDocument uidoc = uiapp.ActiveUIDocument;
      Document doc = uidoc.Document;

      Log( "OnIdling image changed, active document "
        + doc.Title );

      Transaction transaction
        = new Transaction( doc, "Revit Webcam Update" );

      transaction.Start();

      View view = doc.ActiveView; // maybe has to be 3D

      SpatialFieldManager sfm
        = SpatialFieldManager.GetSpatialFieldManager(
          view );

      if( null == sfm )
      {
        sfm = SpatialFieldManager
          .CreateSpatialFieldManager( view, 1 );
      }

      if( 0 > _sfp_index )
      {
        _sfp_index = sfm.AddSpatialFieldPrimitive(
          _faceReference );
      }

      int nPoints = data.Width * data.Height;

      IList<UV> pts = new List<UV>( nPoints );

      IList<ValueAtPoint> valuesAtPoints
        = new List<ValueAtPoint>( nPoints );

      Face face = _faceReference.GeometryObject
        as Face;

      GetFieldPointsAndValues( ref pts,
        ref valuesAtPoints, ref data, face );

      FieldDomainPointsByUV fieldPoints
        = new FieldDomainPointsByUV( pts );

      FieldValues fieldValues
        = new FieldValues( valuesAtPoints );

      sfm.UpdateSpatialFieldPrimitive(
        _sfp_index, fieldPoints, fieldValues );

      transaction.Commit();
      doc.Regenerate();

      _lastUpdate = DateTime.Now;
    }
  }
}
Notice that we open our own transaction here and regenerate the document manually.
The mainline of the external command Execute method putting this all together looks like this:
UIApplication uiapp = commandData.Application;
UIDocument uidoc = uiapp.ActiveUIDocument;
Document doc = uidoc.Document;
View view = doc.ActiveView; // maybe has to be 3D

Reference r = uidoc.Selection.PickObject(
  ObjectType.Face,
  new BimElementFilter(),
  _prompt );

Debug.Assert( null != r,
  "expected non-null reference from PickObject" );

Debug.Assert( null != r.Element,
  "expected non-null element from PickObject" );

Debug.Assert( null != r.GeometryObject,
  "expected non-null geometry object from PickObject" );

SpatialFieldManager sfm
  = SpatialFieldManager.GetSpatialFieldManager(
    view );

if( null != sfm && 0 < _sfp_index )
{
  sfm.RemoveSpatialFieldPrimitive(
    _sfp_index );

  _sfp_index = -1;
}
_faceReference = r;

SetAnalysisDisplayStyle( doc );

uiapp.Idling
  += new EventHandler<IdlingEventArgs>(
    OnIdling );

return Result.Succeeded;
The mainline is enclosed in an exception handler, but I have not noticed any exceptions being thrown by it so far.
The command uses manual transaction mode and the manual regeneration option, since the required transaction and regeneration handling is indeed implemented by the OnIdling method.
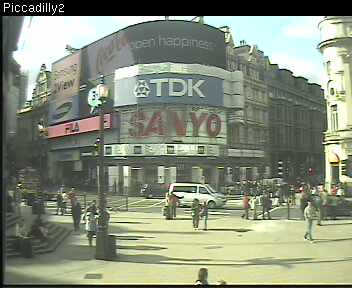
We can use of the view of Piccadilly Circus from the webcam we used for our image grabbing samples:
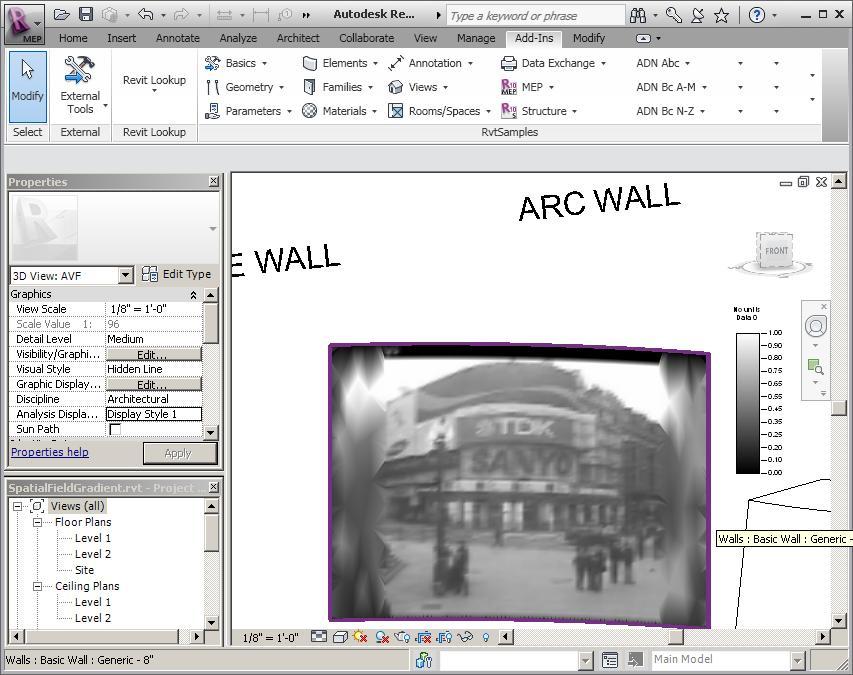
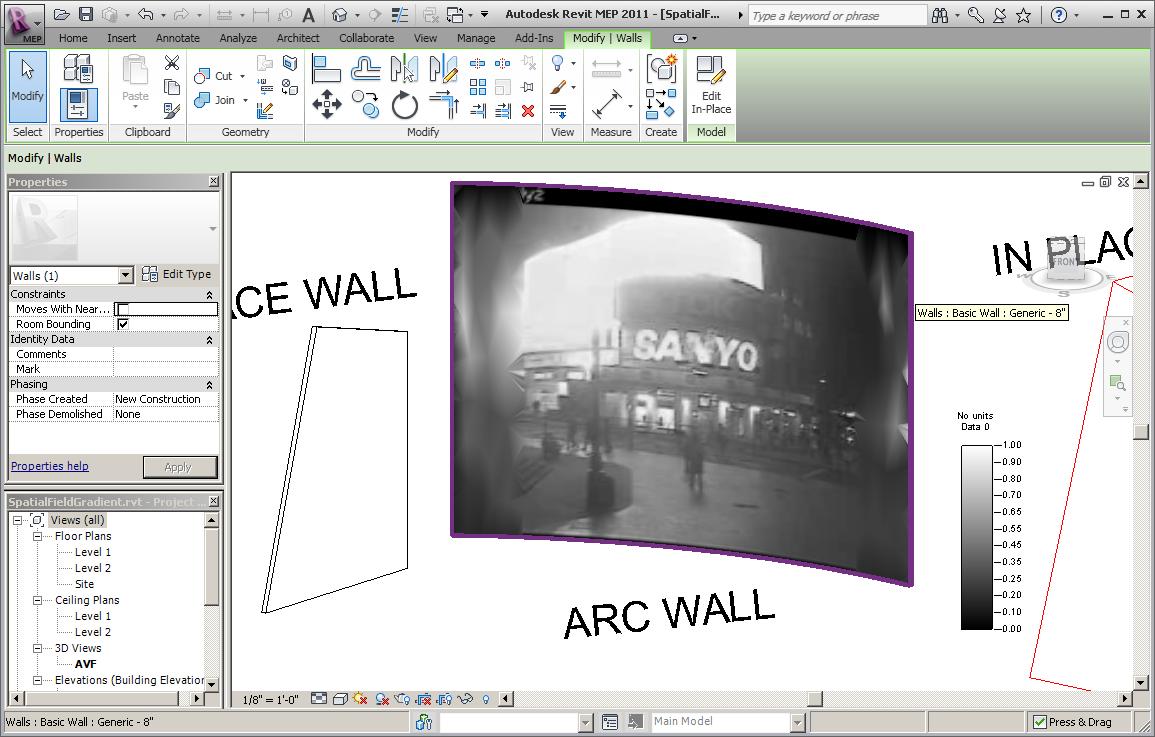
I test ran the add-in in the sample project SpatialFieldGradient.rvt provided with the AVF SDK sample mentioned above, which contains various types of wall elements. Here is a daytime view of the Revit screen:
Here is a similar view at night:
Here is RevitWebcam.zip containing the complete source code and Visual Studio solution for this Revit external command add-in.
I still have one more Idling sample up my sleeve which I hope to be able to document in the coming days as well. Meanwhile, I hope that you find this as interesting as I do, even if this specific sample may not have that many immediate uses in most people's day-to-day work, and that the underlying principles and solution steps are useful anyway.