I returned from the Barcelona Forge Accelerator, where I started an exciting new project connecting BIM and the cloud demonstrating two cool possibilities to enhance interaction with the View and Data API:
Let's look at these topics in more detail:
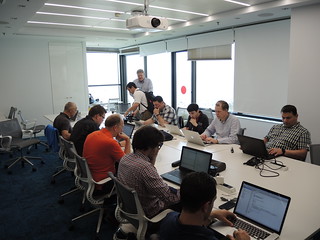
Here are some pictures from the accelerator.
Arrival in Barcelona and the Autodesk office in Poble Nou:
Relaxing from intensive cloud programming on a two-hour sailboat cruise:

On Thursday night I found a very nice and friendly restaurant in Poble Nou, Aguaribay. I asked what the word 'aguaribay' means and discovered it is an indigenous South American word for the 'pepper tree' growing aromatic red pepper corn berries. Very tasty.
The accelerator itself went very well.
Here are some notes from the demos on the last day:
All very exciting and promising stuff!
Roomedit3d is yet another addition to my collection of samples demonstrating connecting the desktop and the cloud using a Revit BIM model communicating round-trip and real-time with a web-hosted data collection.
This one is based on the same idea as my venerable old RoomEditorApp, with two significant and interesting enhancements:
The RoomEditorApp creates a vastly simplified 2D SVG model of selected rooms, displays it any browser, including on any mobile device, enables you to interactively move and rotate furniture family instances, and updates the BIM model accordingly in real time.
The other important sample connecting the desktop and the cloud is FireRatingCloud.
Just like RoomEditorApp and FireRatingCloud, Roomedit3d consists of two parts:
Here are the main steps required to implement the roomedit3d node.js web server handling the viewer side of things:
POST call to send the element selection and translation data back from the JavaScript viewer browser client to the node.js web server.The C# .NET Revit add-in Roomedit3dApp is still in its early stages, and includes the following:
Arif Hanif asked a very valid question in a comment on my initial description of this project:
Question: The roomeditor with View and Data API seems interesting.
I did not know you could make edits in the View and Data API?
Answer: Thank you for your pertinent question.
The View and Data API consists of two parts:
The viewer displays the translated JSON data stream using three.js.
That is completely open source and JavaScript based.
Three.js can also be used to edit the scene.
The system is read-only in the sense that you cannot save back any changes directly back to the original CAD source model.
You can however modify the scene, retrieve and store those modifications in your own format, and implement your own functionality to update the original CAD model accordingly, if you so please.
That is what all my samples connecting BIM and the cloud demonstrate.
I hope this clarifies.
The first step listed above, setting up the View and Data API viewer and displaying a model, including the REST API to handle the authorisation token, is completely based on Philippe Leefsma's View and Data API boilerplate.
It implements the complete node.js web server, viewer, authorisation token handling and a REST API for the browser client to query the web server for it.
Once that was up and running with the sample model of my choice, I added the TransformTool extension from Philippe's collection of View and Data API JavaScript extensions for the viewer, showing what is doable with the client-side JavaScript API, documented in the discussion on visually moving your components in the viewer.
Those two steps were really quick and easy.
Many thanks to Philippe for his help with them!
The TransformTool enables a user to interactively select an element in the viewer and manipulate its location.
We need to communicate the selected element external id and the resulting translation vector back to the desktop CAD model.
I renamed the extension module to Roomedit3dTranslationTool.js and implemented two variables to capture this data, _externalId and _initialHitPoint.
Thee external id is determined from the viewer dbId in the selection changed event handler like this:
  function onSelectionChanged(event) {
    var dbId = event.dbIdArray[0];

    if(dbId) {
      viewer.getProperties(dbId, function(result){
        _externalId = result.externalId;
      });
    }
    handleSelectionChanged(event.fragIdsArray);
  }
The interesting stuff happens in the handleButtonUp event handler.
It:
offset
this.handleButtonUp = function(event, button) {

  if( _isDirty && _externalId && _initialHitPoint ) {
    var offset = subtract_point(
      _transformControlTx.position,
      _initialHitPoint );

    _initialHitPoint = new THREE.Vector3(
      _transformControlTx.position.x,
      _transformControlTx.position.y,
      _transformControlTx.position.z );

    console.log( 'button up: external id '
      + _externalId + ' offset by '
      + pointString( offset ) );

    var data = {
      externalId : _externalId,
      offset : offset
    }

    options.roomedit3dApi.postTransform(data);

    _isDirty = false;
  }

  _isDragging = false;

  if (_transformControlTx.onPointerUp(event))
    return true;

  return false;
};
The postTransform function invoked above to POST the translation from the viewer to the web server is implemented by the Roomedit3dApiClient using
the [JavaScript fetch method(https://fetch.spec.whatwg.org/#dom-global-fetch) defined by]
the Fetch standard and provided by
the whatwg-fetch npm package like this:
var Roomedit3dApiClient = function(args) {

  var _apiUrl = args.baseUrl;

  this.postTransform = function(data) {
    return fetch(_apiUrl + '/transform', {
      method: 'POST',
      headers: {
        'Accept': 'application/json',
        'Content-Type': 'application/json'
      },
      body: JSON.stringify(data)
    });
  }
}
Now we come to the exciting part.
Once the node.js web server has received the translation information from the viewer client in the browser, it broadcasts it to any number of clients using socket.io.
In case you are interested, here is a nice socket.io getting started sample implementing a bidirectional chat.
The node.js server mainline sets up the socket like this:
var io = require('socket.io');
var roomedit3d = require('./routes/api/roomedit3d');

// . . .

app.set('port', process.env.PORT || 3000);

var server = app.listen(
  app.get( 'port' ),
  function() {
    var a = server.address().port;

    console.log(
      'Roomedit3d server ' + pkg.version
      + ' listening at port ' + a + '.'
    );

    var io2 = io(server);

    io2.on('connection', function(client){
      console.log('a client connected to the roomedit3d socket');
    });

    app.use('/api/roomedit3d', roomedit3d(io2));
  }
);
The socket is passed in to the roomedit3d module, which implements the api/roomedit3d/transform POST route and immediately passes the data on to the socket to broadcast like this:
var express = require('express');

module.exports = function(io) {

  var router = express.Router();

  router.post('/transform', function (req, res) {
    console.log(req.body);

    //req.body.externalId; // external id == Revit UniqueId
    //req.body.offset; // THREE.Vector3 offset x y z

    io.sockets.emit('transform', req.body);

    return res.send();
  });

  return router;
}
Pretty easy, isn't it?
Subscribing to the broadcast from the desktop in C# is easier still!
I started implementing the Roomedit3dApp C# .NET Revit API add-in client.
To test the connection and receive the socket broadcast notifications, however, we have no need for all the Revit API overhead.
I implemented the simple stand-alone console test executable Roomedit3dSocketTest to do so.
It makes use of the SocketIoClientDotNet Socket.IO client library for .NET, which is also available as a NuGet package.
Here is the resulting packages.config:
<?xml version="1.0" encoding="utf-8"?>
<packages>
  <package id="EngineIoClientDotNet" version="0.9.22" targetFramework="net452" />
  <package id="Newtonsoft.Json" version="8.0.1" targetFramework="net452" />
  <package id="SocketIoClientDotNet" version="0.9.13" targetFramework="net452" />
  <package id="WebSocket4Net" version="0.14.1" targetFramework="net452" />
</packages>
With the help of that, the console application mainline implements the following steps:
transform message, format and log the infoThat is achieved with the following few lines of code:
using System.Threading;
using Newtonsoft.Json.Linq;
using Quobject.SocketIoClientDotNet.Client;
using System;

namespace Roomedit3dSocketTest
{
  class Program
  {
    const string _url = "https://roomedit3d.herokuapp.com:443";

    static void Main( string[] args )
    {
      var options = new IO.Options()
      {
        IgnoreServerCertificateValidation = true,
        AutoConnect = true,
        ForceNew = true
      };

      Socket socket = IO.Socket( _url, options );

      socket.On( Socket.EVENT_CONNECT, () =>
      {
        Console.WriteLine( "Connected" );
      } );

      socket.On( "transform", (data) =>
      {
        JObject data2 = JObject.FromObject( data );

        Console.WriteLine( string.Format(
          "transform: externalId={0} ({1:0.00},{2:0.00},{3:0.00})",
          data2["externalId"], data2["offset"]["x"],
          data2["offset"]["y"], data2["offset"]["z"] ) );
      } );

      while ( true ) { Thread.Sleep( 100 ); }
    }
  }
}
Here is a six-minute demo recording showing:
The current versions of roomedit3d and Roomedit3dApp discussed above are release 0.0.4 and release 2017.0.0.2, respectively.
The Roomedit3dSocketTest console application is just a proof of concept.
Obviously, I now want to implement the real thing:
Not to mention much more urgent other things, such as preparing for the upcoming Forge DevCon!