As mentioned, I am preparing a Node.js REST API class for the Milano WebGL workshop end of this month.
I will also need this material – and much more – for my RTC Europe and AU classes, assuming my proposal for the latter is accepted.
Let's finally get going with it.
My plan is to create a node server using Express, implement a REST API for it, and drive a simple mongodb database.
I covered lots of preliminary explorations for the first two steps quite extensively:
Lets' put together the result in the shape of the following succinct steps:
If you are starting from scratch, you will obviously need to install node and also the JavaScript package manager npm before you can continue.
I will call my REST-driven mongodb node server app jmonodb and place it in its own cosy little home directory.
I use Express to read the incoming request HTTP headers and actions, i.e., GET, POST, PUT or DELETE.
In order to use it, we need to install it first as well.
That is most easily achieved by implementing a package.json file describing the application and its dependencies.
I created a rather fleshed out package description, since I copied it from an existing file – it looks like this:
{
  "name": "jmonodb",
  "description": "A basic REST API driven node.js express mongo server sample",
  "version": "1.0.0",
  "dependencies": {
    "express": "*"
  },
  "files": [
    "LICENSE",
    "README.md"
  ],
  "engines": {
    "node": ">= 0.10.0"
  },
  "contributors": [
    "Jeremy Tammik <jeremy.tammik@eur.autodesk.com>"
  ],
  "license": "MIT",
  "scripts": {
    "start": "node server.js"
  },
  "repository": {
    "type": "git",
    "url": "https://github.com/jeremytammik/jmonodb"
  }
}
With that in place, you can install express by running npm:
$ npm install
With node, npm and express successfully installed, we can set up our initial server.
Create a main application entry point server.js for it as follows:
var express = require('express');

var app = express();

app.get('/', function(request, response) {
  response.send('Hello World!');
});

app.set('port', process.env.PORT || 3001);

var server = app.listen( app.get('port'),
  function() {
    console.log('Server listening at port '
                + server.address().port);
  }
);
This creates the server that listens for requests at the chosen port.
The port can be set through an environment variable and defaults to 3001 if none is defined.
The app.get function takes a callback function expecting two arguments for the request and response.
You use the response to reply to the request.
If nothing is returned, the request will simply time out.
With the code above, requesting the URL path http://localhost:3001/ will return 'Hello World!' as plain text content with an OK header.
To try it out, start the node server from the command line like this:
$ node server.js
Server listening at port 3001
That prints 'Server listening at http://127.0.0.1:3001/'.
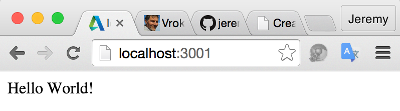
Opening that URL localhost:3001 in the browser will display the expected text message:
Great, first step complete, all prerequisites installed, server up and running!
I stored this state of affairs in the jmonodb GitHub repository as release 1.0.1.
To be continued soon...