Lengthen Ducts and Highlight Links
Today, let's stick with some pure Revit API issues fresh from the forum:
Highlight Linked Element
Lately, Moustafa Khalil very kindly provided a lot of helpful support in the Revit API discussion forum.
He now took a step further, sharing his research and explanation on how to highlight elements from a linked document, a frequently raised topic, and even starting a new BIM blog, saying:
The past 2 days I was scratching my head of how to highlight an element from a linked document. I tried different API approaches and found several existing posts requesting this, e.g.:
- How to select linked element by element Id
- highlight and tag linked elements
- How to highlight element in Linked model by API
- High light Link Element
- Can't select elements in a linked model
There is a corresponding wish in the Revit Idea Station:
The good news, after reading over the Revit API docs: it seems this wish has been granted since Revit 2023.
A new Selection function called SetReferences was added, allowing elements to be highlighted via a set of references.
I don't often use references to highlight elements, but rather to set hosts, like placing hosted families or extracting element IDs from a ReferenceIntersector or when selecting by picking.
So, if we provide the SetReferences function with references from a linked document, will it work?
Yes.
However, some extra work is required to capture such element references.
Firstly, we need to understand that this function operates on the currently active document.
This means that the references we provide must be in a format that the current document can recognize to highlight them in the current view.
Let's attempt to highlight a face from an element in a linked document in the following steps:
- Click on a point over one of the faces in a linked document.
- Pass this reference to
SetReferences, and it will highlight the face from the linked document. - Similarly, if you press Tab to cycle through line, face, and object, once you reach the object, select it to get the object reference.
var linkedFaceReference = UiDoc.Selection.PickObject(
  Autodesk.Revit.UI.Selection.ObjectType.PointOnElement
);
UiDoc.Selection.SetReferences([linkedFaceReference]);
Now, this works when a user interacts with the UI.
What if I have an element ID from a linked document that I want to highlight?
The real question then becomes, how can I extract a reference from an ElementId that belongs to a linked document?
This is achievable, but not directly from the ElementId;
we need to work with the element itself.
First, we need to get the element from the linked document, then create a reference for this element.
However, this reference is only meaningful to the linked document, not the current one.
We can convert it to the current document using CreateLinkReference and the RevitLinkInstance.
The code below clearly demonstrates how it functions.
If you already have the linked ElementId, you can directly start from line 10, without the need for selection:
 var pickedReference = UiDoc.Selection.PickObject(
  Autodesk.Revit.UI.Selection.ObjectType.PointOnElement
);

// get Revit link Instance and its document
var linkedRvtInstance = Doc.GetElement(pickedReference) as RevitLinkInstance;
var linkedDoc = linkedRvtInstance.GetLinkDocument();

//get the Linked element from the linked document
var linkedElement = linkedDoc.GetElement(pickedReference.LinkedElementId);

// now create a reference from this element
// -- this is a reference inside the linked document
var reference = new Reference(linkedElement);

// convert the reference to be readable from the current document
reference = reference.CreateLinkReference(linkedRvtInstance);

// now the linked element is highlighted
UiDoc.Selection.SetReferences([reference]);

Yes, the proposed solution is tested and works for me... I will be glad to know if there are any exception to this methodology.
I have also published this on my fresh starting Sharp BIM blog; I will usually journal my findings there as well as here in the forum:
Many thanks to Moustafa for this clear explanation and demonstration, and for all his other great support in the discussion forum!
Best of luck and much success with your new blog!
Modify Duct Length
Moustafa also helped resolve how to modify duct length in Revit API despite read-only property constraint:
Question: I'm wondering if it's possible to alter the length of a duct in Revit through the API. Upon trying, I noticed that the duct length property appears to be set as read-only. Is there a workaround to modify the duct length?
Answer: Yes, it can be done. The API wraps the UI functionality, so the best way to address this is to determine the optimal workflow and best practices manually in the user interface first. How do you solve this in the UI?
So, the API does not directly support changing the duct length. One workaround is to delete the existing one and create a new duct with a new length, then update the neighbouring duct length according to that:
  UIDocument uiDoc = commandData.Application.ActiveUIDocument;
  Document doc = uiDoc.Document;

  Reference refer = uiDoc.Selection.PickObject(Autodesk.Revit.UI.Selection.ObjectType.Element);

  Duct duct = doc.GetElement(refer) as Duct;

  ///New Length Dimension
  double newLength = UnitUtils.ConvertToInternalUnits(10000,UnitTypeId.Millimeters);

  ///Calculating New Length
  LocationCurve curve = duct.Location as LocationCurve;
  XYZ p1 = curve.Curve.GetEndPoint(0);
  XYZ p2 = p1 + ((curve.Curve as Line).Direction * newLength);

  using (Transaction deleteDuctAndCreateNew = new Transaction(doc, "Delete Existing Duct and Create New"))
  {
    deleteDuctAndCreateNew.Start();

    //Create New Duct
    Duct.Create(doc, duct.MEPSystem.GetTypeId(),duct.GetTypeId(), duct.ReferenceLevel.Id, p1, p2);

    doc.Delete(duct.Id);

    deleteDuctAndCreateNew.Commit();
  }

However, deleting an existing element means disconnecting it from the System and losing all instance property values such as mark or comment.
I would be more inclined to only increase the length of the MepCurve (duct, pipe, conduit...etc.):
var locCurve = ductObject.Location as LocationCurve;
locCurve.Curve = extendedCurve;
If the duct is connected to neighbouring elements, you can let Revit modify and adapt its length automatically by moving those neighbours and their connection points. Look at an exploration of different approaches to modifying pipe length in the blog post series on implementing a rolling offset.
Just moving the neighbour elements will keep all the connections intact.
To add another approach, for those MEP curves without neighbour connections: We may also extend the curve directly by its connector, which means no new line or assigning a location curve is needed:
Connector connector = getMyConnector();
double extendby = 1; // extend by 1 feet for example
XYZ direction = ductCurve.Direction; // assuming the duct is linear curve
connector.Origin = connector.Origin + direction * extendby;
Thank you both, Mohamed Arshad K and Moustafa Khalil, for chipping in on this!
IsMainWindowActive Predicate
Aleksandr '@ModPlus' Pekshev raised the question and shared his working solution for how to detect is opened preview document in type properties:
Question:
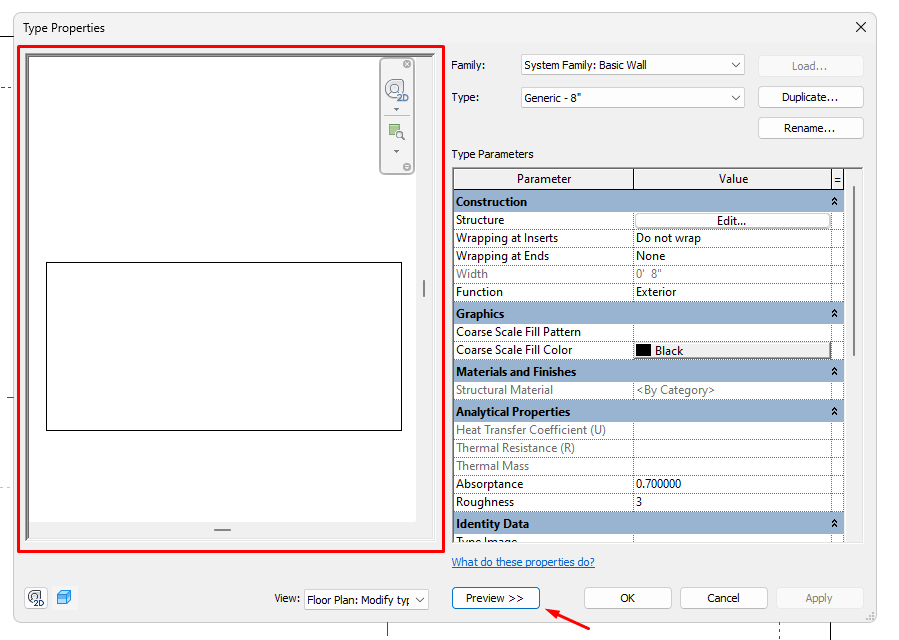
There is a Preview button in the type properties dialog.
If you click it, then, as far as I know, a copy of the current document will be created with a new view (I could be wrong here):

The problem is that in this case IUpdater is triggered, which can lead to negative consequences.
Question: how can I detect that this Preview is open, or how can I detect that the dialog for editing type properties is open?
Answer: You can use the native Windows API to detect that a specific Windows form is open. This can also be done in .NET. You can search for something like .net detect form open to learn more.
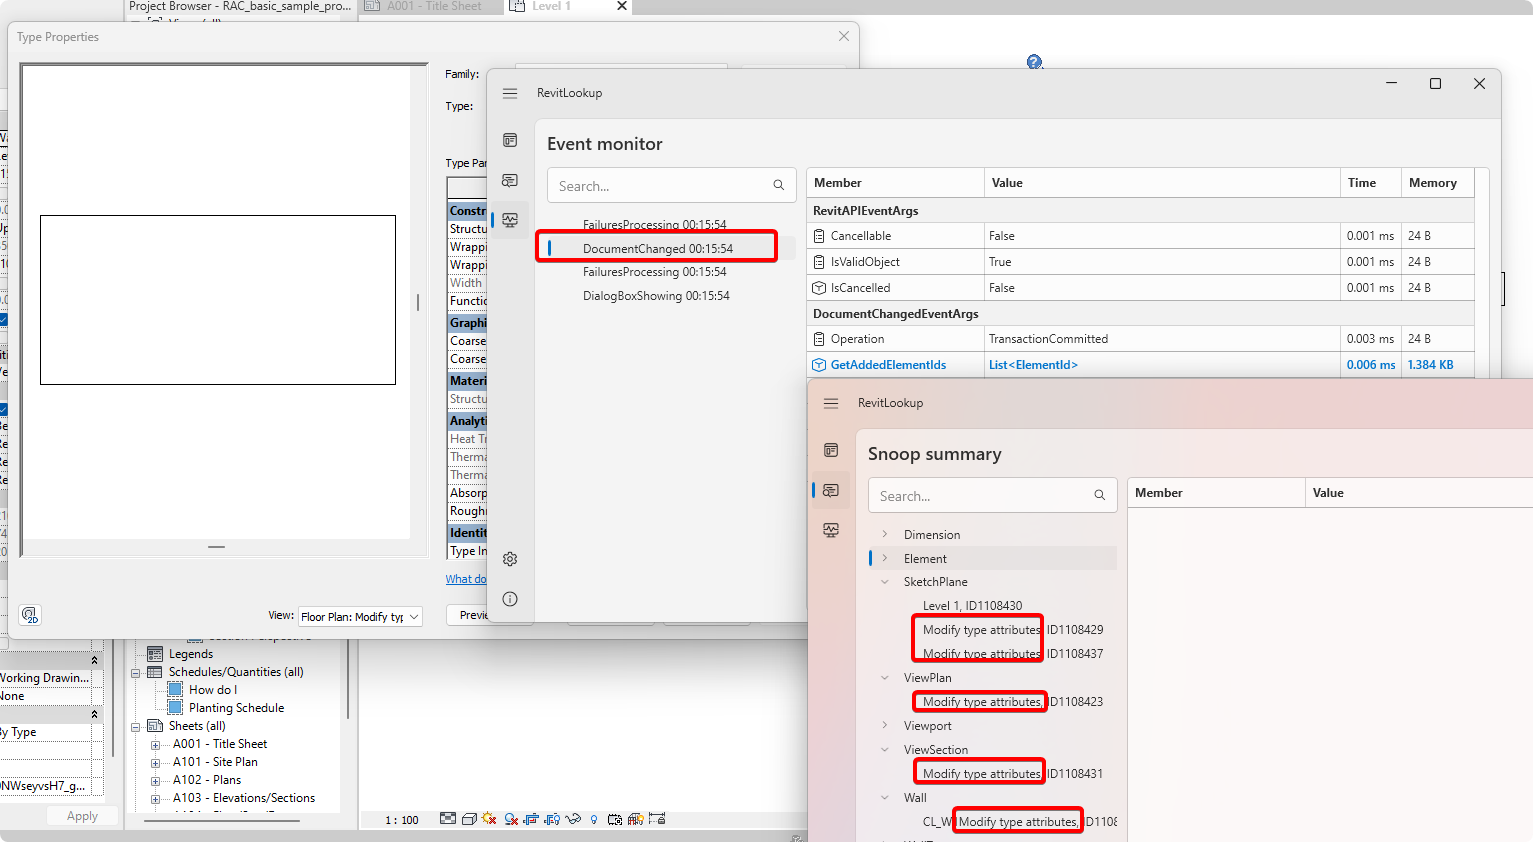
You might also try to track the DocumentChanged event; Revit creates elements and a view with a persistent name ‘Modify type attributes’.
This name is probably language dependent, but Revit does not create any other events:

Response: I ended up using the built-in Revit API functionality to implement a small auxiliary class to solve it like this:
using System;
using System.Runtime.InteropServices;
using Autodesk.Revit.UI;
///
/// Initializes a new instance of the
///
/// Is main Revit window active
///
public bool IsMainWindowActive() => GetActiveWindow() == _mainWindowHandle;
}
I create and store its static instance in the application class, and check it in IUpdater as follows:
public void Execute(UpdaterData data)
{
  if (!App.RevitWindowUtils.IsMainWindowActive())
    return;
Many thanks to Aleksandr for this elegant solution.