Change Pipe Level and PreviewControl Border
Picking up two illuminating conversations from the Revit API discussion forum:
Spying to Suppress the PreviewControl Border
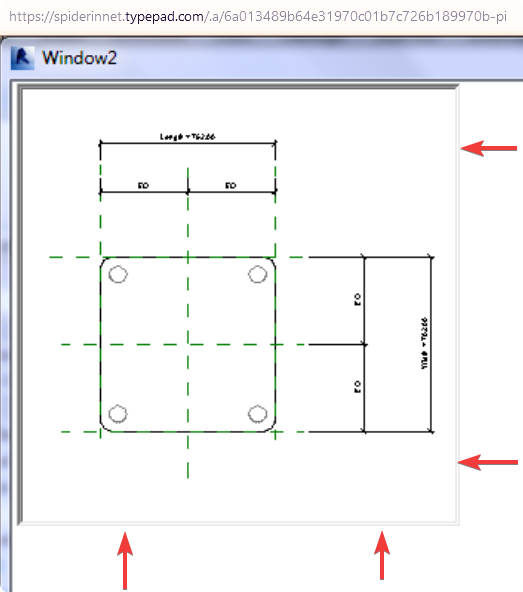
Roman @Nice3point Karpovich, aka Роман Карпович, raised and solved the question of how to suppress the unwanted PreviewControl border:
Question: Is it possible to disable the PreviewControl border ? This border comes from the Win32 window. Setting User32.WindowStyles by Hwnd handle does not give any results. Except WS_CHILD and similar, no other styles are applied. Is this border added by Revit development team or is it a HwndHost issue ?

Answer: The only way I could do it when I used it, was to set the Grid margin to -4, but this only works if the grid is set entirely to the window.
Response: That is not a solution; the negative margin just covers other content.
Answer: I don't like the negative margin either, but it was the only way to hide the border. And for it to work, the container (Grid) must cover the entire window.
Answer B: You can use Spy++ to determine the window structure and use WinAPI to remove the borders and some WPF magic to trigger the repaint. It took me hours of experimenting, but it is doable. If I recall correctly, there are multiple levels of controls and you have to figure out which ones carry the borders.
I am off for a while and have no access to the code, but don’t feel discouraged if it doesn’t work the first time. It was really painful to solve this and I wish Autodesk would just remove the borders in an upcoming release. It is hard to make software look good if the underlying API takes you back to the nineties ;-).
I can post some code for you to fill the gaps.
The important snippet (to be called after previewControl.Loaded AND previewControl.IsVisibleChanged) is the following:
// get preview window host
var previewWndHost = previewControl.Content;
if (previewWndHost is null)
  return;

// get preview view handle
var previewHwnd = (IntPtr)previewWndHost.GetType().GetProperty("Handle").GetValue(previewWndHost, null);
if (previewHwnd == IntPtr.Zero)
  return;

// remove WS_EX_CLIENTEDGE on all child windows
foreach (var hwnd in HwndHelpers.GetAllChildHandles(previewHwnd).Append(previewHwnd))
{
  var style = User32.GetWindowLong(hwnd, Constants.GWL_EXSTYLE).ToInt32() & ~(int)Constants.WS_EX_CLIENTEDGE;
  User32.SetWindowLong(hwnd, Constants.GWL_EXSTYLE, style);
}

// trigger redraw by adding or removing a slight padding at the bottom
// the original padding is stored in the tag, so try to avoid using the
// tag property for anything else if you want this to work.
var p = previewControl.Padding;
if (previewControl.Tag is null)
  previewControl.Tag = p;
if (previewControl.Tag is System.Windows.Thickness t)
{
  p.Bottom = p.Bottom == t.Bottom ? p.Bottom + 1 : t.Bottom;
  previewControl.Padding = p;
}
The IsVisibleChanged handler is required for use in tab controls, since Revit seems to re-create the view in case of visibility changes.
I misused the tag to save the previous state and avoid shrinking/growing of the control due to the padding-changes at "reentry".
If you find a better solution to trigger the redraw, please let me know.
This part is pretty hacky, but I had to move on at some point and got stuck with whatever did the job.
I also use some WinAPI functions which can be easily imported (google, pinvoke). The HwndHelpers function is just syntactic sugar around EnumChildWindows.
public static IList<IntPtr> GetAllChildHandles(IntPtr hwnd)
{
  var childHandles = new List<IntPtr>();
  var gcChildHandles = GCHandle.Alloc(childHandles);

  try
  {
    bool EnumWindow(IntPtr hWnd, IntPtr lParam)
    {
      (GCHandle.FromIntPtr(lParam).Target as List<IntPtr>)?.Add(hWnd);
      return true;
    }

    var childProc = new User32.EnumWindowsProc(EnumWindow);
    User32.EnumChildWindows(hwnd, childProc, GCHandle.ToIntPtr(gcChildHandles));
  }
  finally
  {
    gcChildHandles.Free();
  }
  return childHandles;
}
Response: Amazing. I completely forgot about the Child when writing similar code. Now all borders are gone. In addition, I have solved the redrawing problem, for which you used Padding (it was not working correctly).
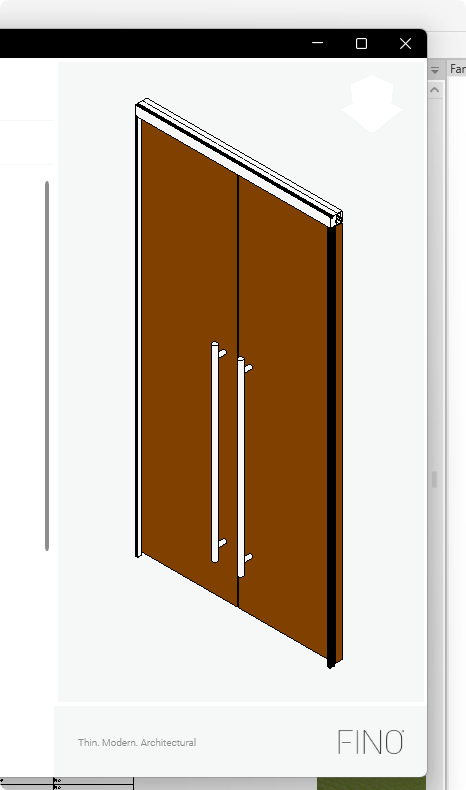
Before:

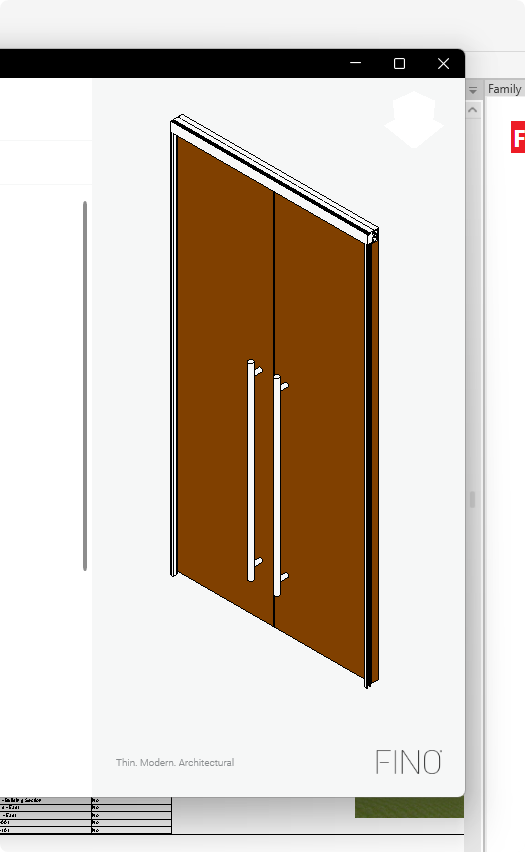
After:

Solution:
public void Initialize()
{
  var previewControl = new PreviewControl(_context, view.Id);
  previewControl.Loaded += RemovePreviewControlStyles;
}

private void RemovePreviewControlStyles(object sender, EventArgs args)
{
  var control = (PreviewControl)sender;
  var previewHost = (FrameworkElement)control.Content;
  var previewType = previewHost.GetType();
  var hostField = previewType.GetField("m_hwndHost", BindingFlags.NonPublic | BindingFlags.DeclaredOnly | BindingFlags.Instance)!;
  var handle = (IntPtr)hostField.GetValue(previewHost);

  var childHandles = UnsafeNativeMethods.GetChildHandles(handle);

  UnsafeNativeMethods.RemoveWindowStyles(handle);
  UnsafeNativeMethods.RemoveWindowCaption(handle);
  foreach (var childHandle in childHandles)
  {
    UnsafeNativeMethods.RemoveWindowStyles(childHandle);
  }
}
UnsafeNativeMethods:
/// <summary>
/// Tries to remove styles from selected window handle.
/// </summary>
/// <param name="handle">Window handle.</param>
/// <returns><see langword="true"/> if invocation of native Windows function succeeds.</returns>
public static bool RemoveWindowStyles(IntPtr handle)
{
  if (handle == IntPtr.Zero)
  {
    return false;
  }

  if (!User32.IsWindow(handle))
  {
    return false;
  }

  var cornerResult = ApplyWindowCornerPreference(handle, WindowCornerPreference.DoNotRound);
  if (!cornerResult) return false;

  var windowStyleLong = User32.GetWindowLong(handle, User32.GWL.GWL_EXSTYLE);
  windowStyleLong &= ~(int)User32.WS_EX.CLIENTEDGE;

  var styleResult = SetWindowLong(handle, User32.GWL.GWL_EXSTYLE, windowStyleLong);
  return styleResult.ToInt64() > 0x0;
}

/// <summary>
///   Get the child windows that belong to the specified parent window by passing the handle to each child window.
/// </summary>
/// <param name="hwnd">Window handle.</param>
public static IList<IntPtr> GetChildHandles(IntPtr hwnd)
{
  var handles = new List<IntPtr>();
  var gcHandles = GCHandle.Alloc(handles);

  try
  {
    var callbackPointer = new User32.EnumWindowsProc(EnumWindowCallback);
    User32.EnumChildWindows(hwnd, callbackPointer, GCHandle.ToIntPtr(gcHandles));
  }
  finally
  {
    gcHandles.Free();
  }
  return handles;
}

private static bool EnumWindowCallback(IntPtr hwnd, IntPtr lParam)
{
  var target = GCHandle.FromIntPtr(lParam).Target as List<IntPtr>;
  if (target is null) return false;

  target.Add(hwnd);
  return true;
}
User32:
/// <summary>
/// An application-defined callback function used with the EnumChildWindows function.
/// It receives the child window handles. The WNDENUMPROC type defines a pointer to
/// this callback function. EnumChildProc is a placeholder for the application-defined
/// function name.
/// </summary>
public delegate bool EnumWindowsProc(IntPtr hWnd, IntPtr lParam);

/// <summary>
/// Enumerates the child windows that belong to the specified parent window by
/// passing the handle to each child window, in turn, to an application-defined
/// callback function. EnumChildWindows continues until the last child window
/// is enumerated or the callback function returns FALSE.
/// </summary>
/// <param name="hwnd">The window that you want to get information about.</param>
/// <param name="func">A pointer to an application-defined callback function</param>
/// <param name="lParam">An application-defined value to be passed to the callback function.</param>
/// <returns></returns>
[DllImport(Libraries.User32)]
public static extern bool EnumChildWindows(IntPtr hwnd, EnumWindowsProc func, IntPtr lParam);
I've also disabled edge rounding for Windows 11. The methods used can be found in the WPF UI repository:
So, problem solved; I think it will be useful to share this on the blog. However, I would like to ask the Revit development team to turn this off by default, as it is easier for users to configure the control themselves than to mess with Win API and native code.
The lines to get me rid of the padding-trick are
- UnsafeNativeMethods.RemoveWindowCaption(handle);
where handle is hwndHost,
cf. UnsafeNativeMethods.cs line 468.
Many thanks to Roman for researching and sharing this helpful solution!
Changing Level of Piping Elements
Evan Geer) shared a nice example for changing the level for selected piping elements in his answer to transferring elements from one level to another while maintaining their position in space
Question: How to move selected elements to another level while maintaining their position in space?
Answer: Can you achieve what you want manually in the end user interface? If so, that is a good start. If not, it would be good to check that first, determine the optimal workflow and best practices, cf. the standard approach to address a Revit API programming task.
Possibly, some elements cannot simply be moved to an different level, but need to be recreated from scratch based on the new level.
There is an older post showing how to do something similar here:
https://forums.autodesk.com/t5/revit-api-forum/change-the-level-of-an-element/td-p/3707640
Here is an example command that will change the level of the selected elements. Note that you will need to determine which parameter you want to change for different types of elements, and as noted above, you may not be able to change the level of some elements. This example changes the level for selected piping elements:
public Result Execute(ExternalCommandData commandData, ref string message, ElementSet elements)
{
  var doc = commandData.Application.ActiveUIDocument.Document;
  var selectedIds = commandData.Application.ActiveUIDocument.Selection.GetElementIds();

  var selectedElements = selectedIds.Select(x => doc.GetElement(x)).ToList();

  var newLevelName = "L2";
  var newLevel = new FilteredElementCollector(doc)
    .OfClass(typeof(Level))
    .FirstOrDefault(x => x.Name == newLevelName) as Level;

  var levelHostedElements = selectedElements
    .Where(x => x.LevelId != null && x.LevelId != ElementId.InvalidElementId)
    .ToList();

  using (var t = new Transaction(doc, "update level"))
  {
    t.Start();
    foreach (var element in levelHostedElements)
    {
      // NOTE: you will need to select the correct parameter for the element type you are targeting
      var levelParameter = element.get_Parameter(BuiltInParameter.RBS_START_LEVEL_PARAM);
      if (levelParameter?.HasValue == true /*&& offsetParameter?.HasValue == true*/)
      {
        var oldLevel = doc.GetElement(levelParameter.AsElementId()) as Level;

        levelParameter.Set(newLevel.Id);
      }
    }
    t.Commit();
  }
  return Result.Succeeded;
}
In order to select a level interactively, transfer all elements from it to the target level, and list elements that were not transferred in a dialog box, you just need some handling for parameters and element type match-up. This seems like a perfect match for an abstract factory pattern or something similar. You might also save some time using the RevitLookup tools to identify which parameters match to which types.
It's not ideal, but I do not think that there is a universal solution to changing the level of an element. As far as I understand, the reason for this is that different elements are hosted by and associated with levels in different ways. So, Revit's engine under the hood is doing different things to make that work, and the options we have exposed to us in the API therefore differ by type.
Regarding handling moving everything on a given level, that can be accomplished with some changes to my example.
Where I have hard-code the level name in newLevelName, set to "L2"; you could easily replace that with a UI allowing users to select the destination level. Similarly, you could add a UI to allow the user to select a source level, and supply that id to this block of code:
  var levelHostedElements = selectedElements
    .Where(x => x.LevelId == sourceLevel.Id)
    .ToList();
Many thanks to Evan for the nice sample code and thorough explanation!