Accessing Parameters and Hiding DirectShape Edges
I still have a backlog of questions from last week to process.
Here are some of the discussions that came up:
- Shared parameter is either type or instance
- Transferring element parameters
- Hiding DirectShape internal face edges
Shared Parameter is Either Type or Instance
From the StackOverflow question on how to bind a shared parameter to both type and instance elements:
Question: I create a shared parameter programmatically. This works well. I can also bind that parameter to different element types (categories) like Windows or Doors. However, once that is done for a type, I struggle to create a new binding to instances instead.
Is there any way to use ONE single shared parameter and bind that to both types and instances?
Answer: I believe not. A shared parameter is bound to either types or instances, not both.
Response: Thank you for answering so quickly.
I now tried to do it manually as well, through the UI, and got the message that it has already been added, so, unfortunately, you seem to be right. I am probably not the first to say this, but that is just weird behaviour. It forces me to create two parameters which have the completely identical definition to add them to different categories.
Answer: Yes.
You must take into consideration that the shared parameters functionality was added very early in the Revit lifecycle and was completely oriented toward end user interaction. At the time, the Revit API did not even exist, and was not planned for.
Possibly your use case is weird, from a BIM point of view. I am not an expert on the user interface side of things, so I cannot say.
On the other hand, extensible storage was explicitly designed for API use.
If you do not explicitly need the end user or Revit to see and manipulate your data, e.g., for scheduling or other purposes, you should consider using extensible storage instead.
Neither Revit nor the end user will effectively see your extensible storage data.
Depending on your exact needs, this may be what you want or not.
Transferring Element Parameters
How can one retrieve all parameters from an element?
Question: I am working on converting Revit room volumes into DirectShape elements (done already with info from your blog on room closed shell DirectShape for Forge viewer).
The next step is to copy the room parameters into the DirectShape object, in such a way they appear correctly in the UI.
Here is a picture of some DirectShapes (Mass in English, "Volume" in the French version) created with Dynamo:
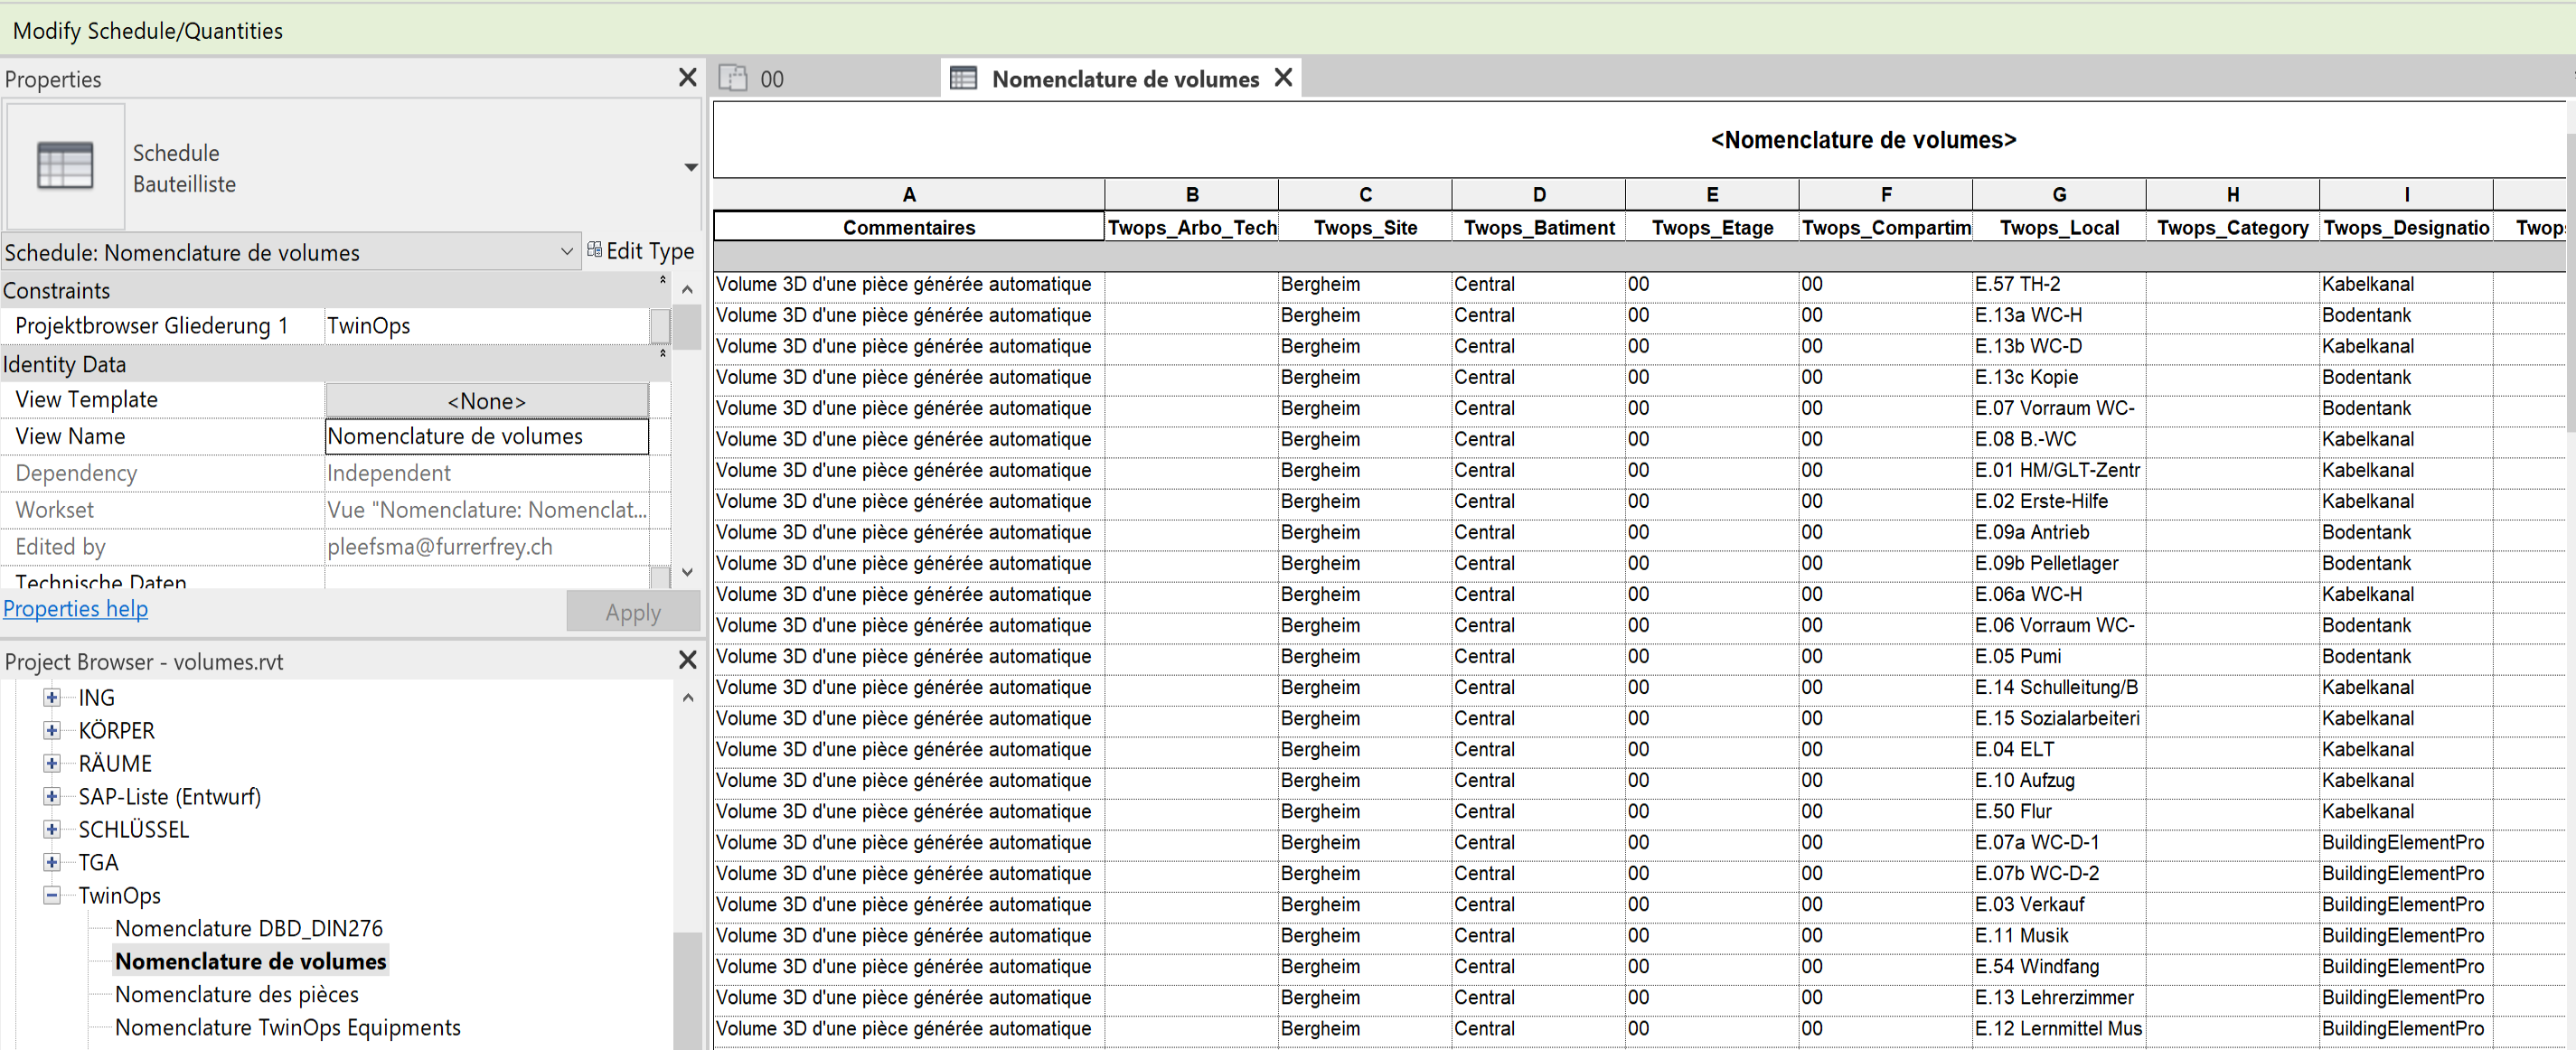
So, I'm able to retrieve the room parameters, and I would like now to create the same in the DS I just created so they show up in that UI.
Note the "Comments" field is already working, I just don't know how to set the others...
Answer: The answer to this is included in the code you already looked at, in the RoomVolumeDirectShape GitHub repository.
look at the lines 695-L708 in Command.cs, especially the lines containing '[Pp]aram'.
Step through those in the debugger and you will see.
Response: Your code is not doing exactly what I was looking for; it copies all the room parameters into one single JSON string in the "Comment" section, whereas I need to populate specific parameters... but, luckily, I found out that those parameters already exist on the newly created DirectShape, probably created by default as part of the project. So, I don't have to create them, just set their values. I'm off the hook for now...
Hiding DirectShape Internal Face Edges
Question: On the topic of creating DirectShape elements... in the pictures below you can see shapes created by my add-in and others created by Dynamo. My add-in shapes display the internal face tessellation edges:
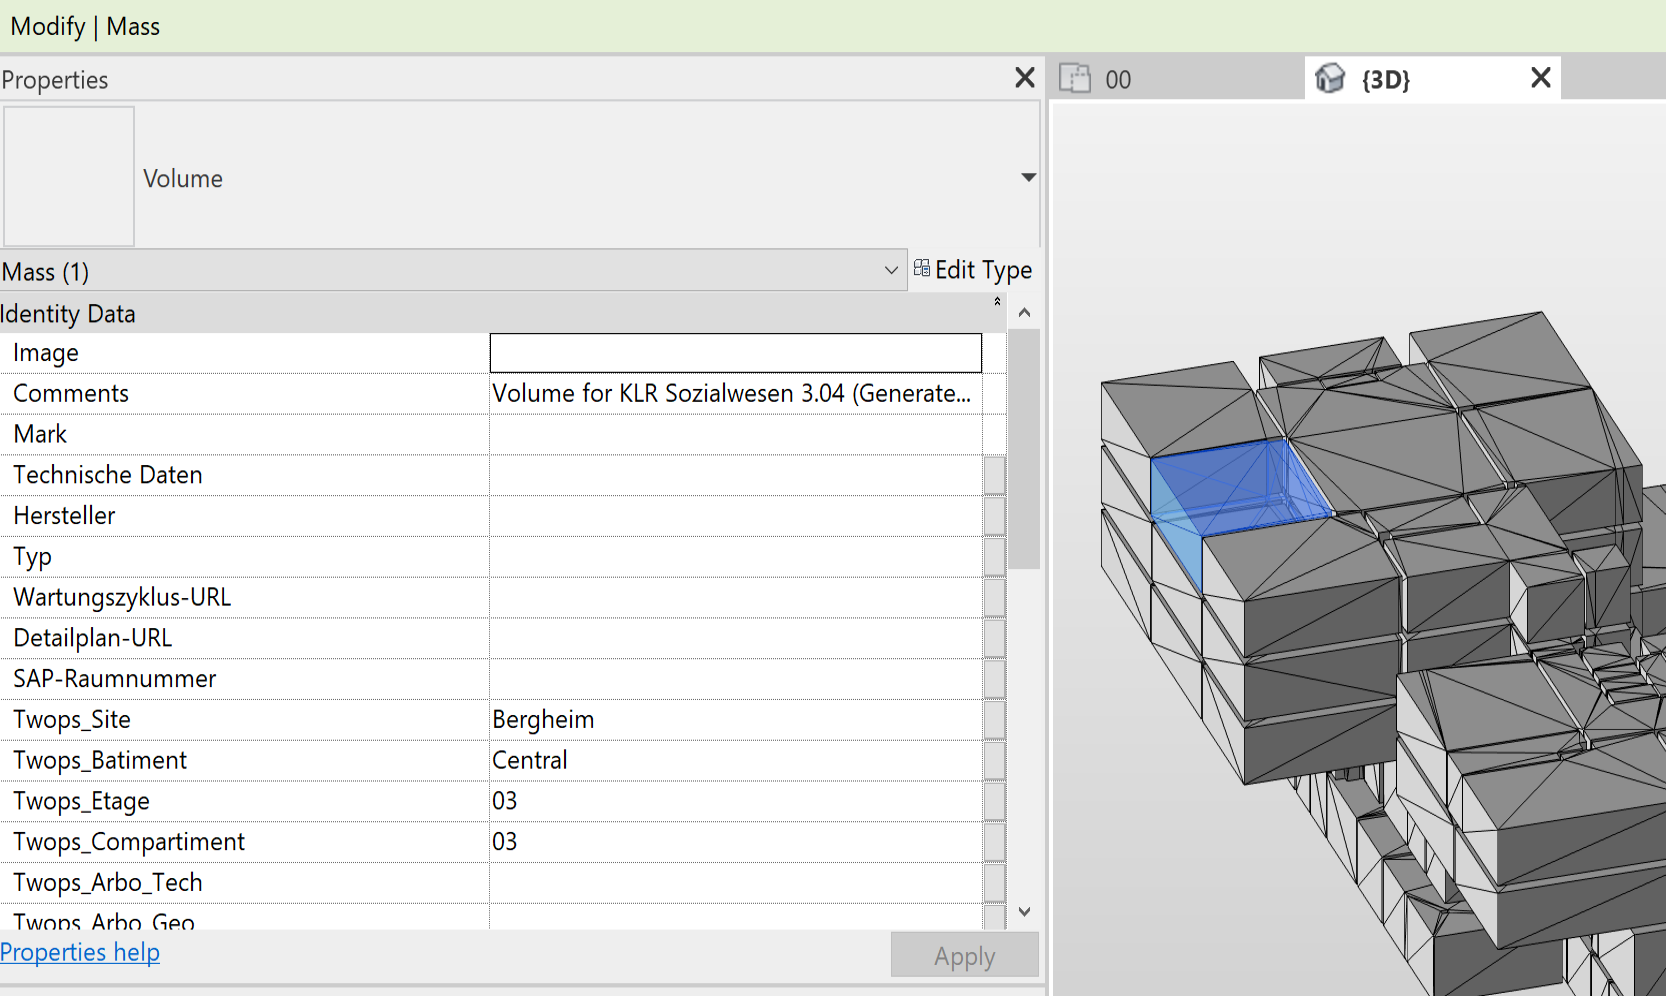
The Dynamo ones do not:
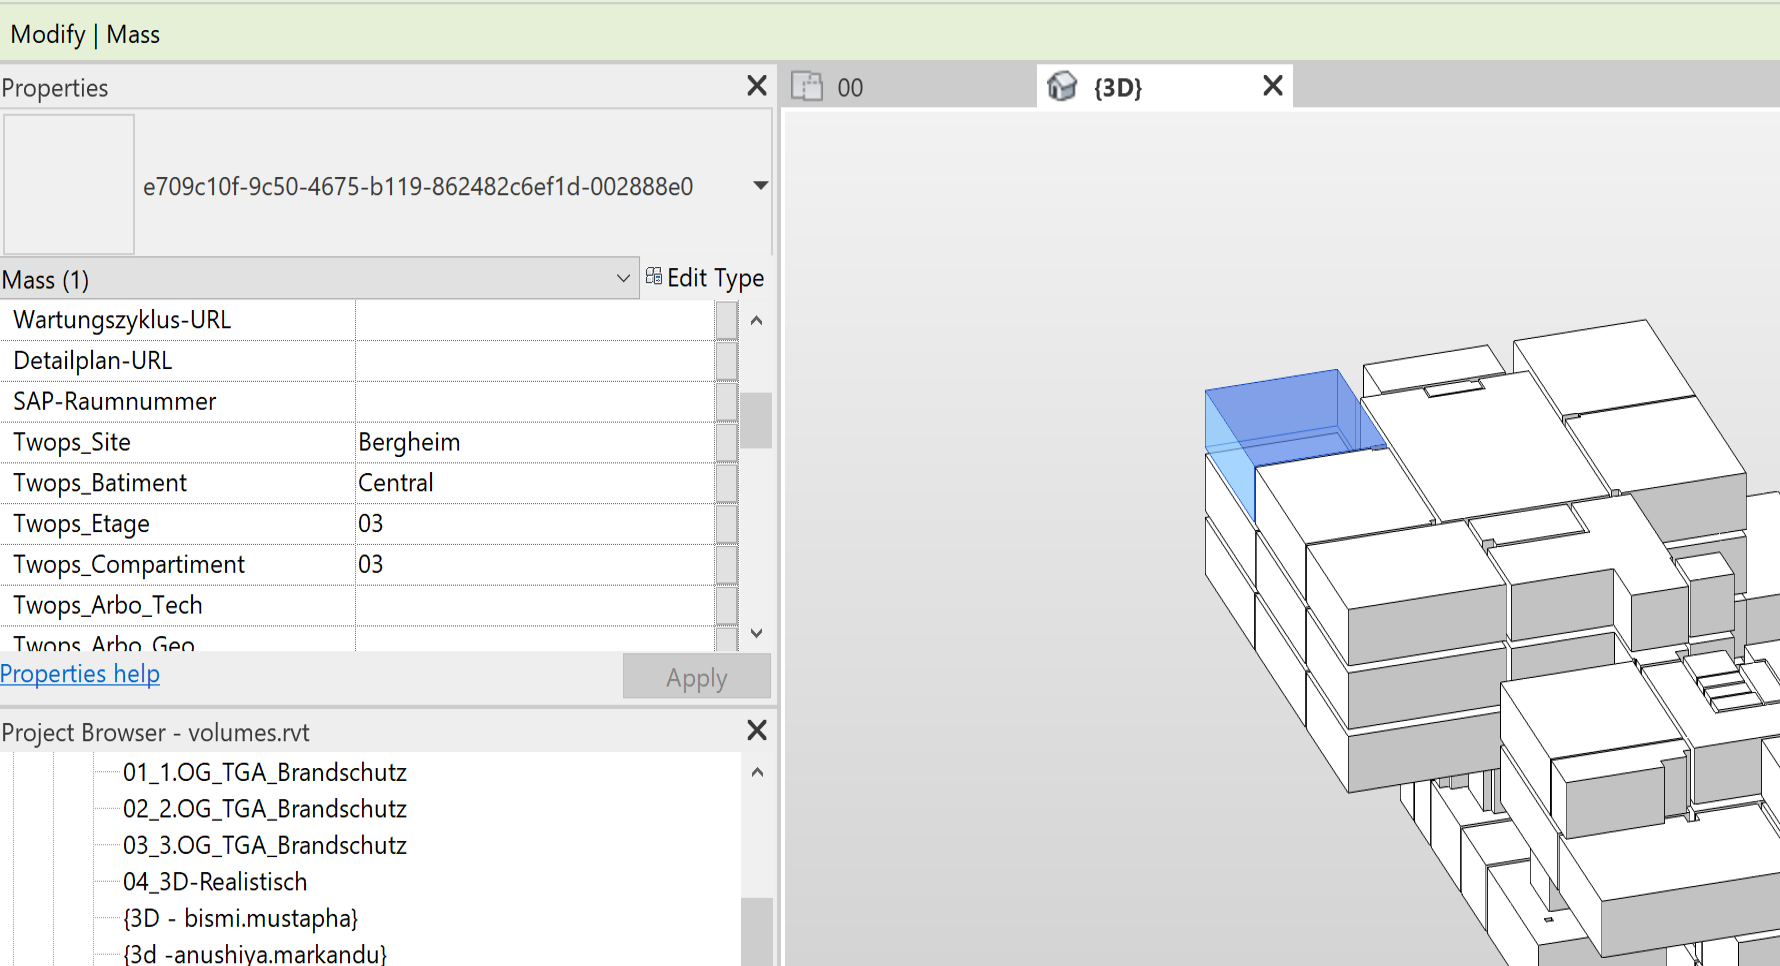
Do you know what the difference is, and whether I can make mine look like the Dynamo ones?
Answer: It looks as if your shapes are created from separate triangular faces.
Would you like to mark some triangle edges, so they are not displayed?
Since Dynamo can do this, there must be a way.
You can always debug the Dynamo code and see for yourself what it is doing.
I would assume it is creating a complete polygonal face with all its edges in one single go.
I think this can be achieved using
the TessellatedShapeBuilder class.
Oh no, wrong, that one probably does generate triangulated faces just like you have.
I believe the BRepBuilder class enables
you to create more complex faces with no edges in the middle: