Set Material Texture Path in EditScope
Lukáš kohoulu3 Kohout
brought up an interesting and important issue in
the Revit API discussion forum thread
on changing material texture path with EditScope that
I wanted to highlight last year. Here it is, finally:
- How to set the material texture path?
- Suggestions
- Solution and sample material
ChangeRenderingTexturePathmethod- Step by step guide
- Test run
How to Set the Material Texture Path?
I am trying to set material texture path using following code (Revit 2018):
  public void ChangeRenderingTexturePath(
    Material mat,
    Document doc,
    string texturePath )
  {
    AppearanceAssetElement appearanceAsset
      = (AppearanceAssetElement) doc.GetElement(
        mat.AppearanceAssetId );

    Asset renderingAsset = appearanceAsset
      .GetRenderingAsset();

    int size = renderingAsset.Size;
    for( int assetIdx = 0; assetIdx < size; assetIdx++ )
    {
      AssetProperty aProperty = renderingAsset[assetIdx];

      if( aProperty.NumberOfConnectedProperties < 1 )
        continue;

      Asset connectedAsset = aProperty.GetConnectedProperty(
        0 ) as Asset;

      if( connectedAsset.Name == "UnifiedBitmapSchema" )
      {
        AssetPropertyString path = connectedAsset.FindByName(
          UnifiedBitmap.UnifiedbitmapBitmap )
            as AssetPropertyString;

        using( AppearanceAssetEditScope editScope
          = new AppearanceAssetEditScope( doc ) )
        {
          Asset editableAsset = editScope.Start(
            mat.AppearanceAssetId );

          // Exception thrown, asset is read only,
          // need to use editScope

          path.Value = texturePath;
          editScope.Commit( true );
        }
      }
    }
  }
I know that editScope accepts only ElementId (specifically AppearanceElementAsset.Id), but with this I cannot get to edit the texture path that is saved in RenderingAsset of the AppearanceAsset.
Do anyone know any way to get around this?
Finally, we can create materials with API, but without textures? Does not make sense.
I am using the latest Revit 2018 API with the asset editing functionality included.
I am able to duplicate and edit AppearanceAsset.
I have searched The Building Coder and read both the relevant posts:
The way I obtain the current texture path is taken directly from the latter.
Problem with the texture path as I see it is, that it is not directly contained in the AppearanceAsset but in the connected RenderingAsset. And to that I cannot get through the EditScope. RenderingAsset has no ElementId and cannot be used in the AppearanceAssetEditScope.Start function.
Exception message:
  An exception of type 'Autodesk.Revit.Exceptions.InvalidOperationException' occurred in RevitAPI.dll but was not handled in user code.
  Additional information: The asset property is not editable. Asset can be edited only in an edit scope.
Problem is that the returned asset from AppearanceAssetEditScope.Start does not contain the desired UnifiedBitmapSchema property. That property is contained only in the RenderingAsset.
Suggestions
The only editable asset inside the edit scope is the one returned from AppearanceAssetEditScope.Start, and those connected assets which it directly returns.
I think if you reverse your code and get the UnifiedBitmapSchema from the returned asset from Start, you will be able to change it.
I'd recommend starting from the code snippet which shows how to do this, available from the help documentation on GetSingleConnectedAsset.
Solution and Sample Material
Thanks Jeremy. Finally, I got it to work. It was quite simple, actually, in the end.
There is just one small change from the code snippet I posted at first.
Here is the (MaterialTexturePath.zip archive)[zip/lk_MaterialTexturePath.zip] containing the entire sample Visual Studio solution with detailed guide as well as a sample project and texture to demonstrate.
I hope that someone finds this useful.
ChangeRenderingTexturePath Method
Here is the final code:
  void ChangeRenderingTexturePath(
    Document doc )
  {
    // As there is only one material in the sample
    // project, we can use FilteredElementCollector
    // and grab the first result

    Material mat = new FilteredElementCollector( doc )
      .OfClass( typeof( Material ) )
      .FirstElement() as Material;

    // Fixed path for new texture
    // Texture included in sample files

    string texturePath = Path.Combine(
      Environment.GetFolderPath( Environment.SpecialFolder.Desktop ),
      "new_texture.png" );

    using( Transaction t = new Transaction( doc ) )
    {
      t.Start( "Changing material texture path" );

      using( AppearanceAssetEditScope editScope
        = new AppearanceAssetEditScope( doc ) )
      {
        Asset editableAsset = editScope.Start(
          mat.AppearanceAssetId );

        // Getting the correct AssetProperty
#if VERSION2018
        AssetProperty assetProperty
          = editableAsset["generic_diffuse"];
#elif VERSION2019
          AssetProperty assetProperty
          = editableAsset.FindByName("generic_diffuse");
#endif

        Asset connectedAsset = assetProperty
          .GetConnectedProperty( 0 ) as Asset;

        // Getting the right connected Asset

        if( connectedAsset.Name == "UnifiedBitmapSchema" )
        {
          AssetPropertyString path
            = connectedAsset.FindByName(
              UnifiedBitmap.UnifiedbitmapBitmap )
                as AssetPropertyString;

          if( path.IsValidValue( texturePath ) )
            path.Value = texturePath;
        }
        editScope.Commit( true );
      }
      TaskDialog.Show( "Material texture path",
        "Material texture path changed to:\n"
        + texturePath );

      t.Commit();
      t.Dispose();
    }
  }
Step by Step Guide
Here are the steps to reproduce the solution:
Goal:
- I want to create materials in Revit programmatically, so would not have to create thousands of materials (NCS palette) by hand.
That is quite simple with the new Revit 2018.1 API and the sample code provided.
Furthermore, for some materials, I want to change the texture as well, and that was bit of a problem.
Solution:
- Retrieve the "generic_diffuse"
AssetPropertyfrom the asset returned fromAppearanceAssetEditScope.Start. - Retrieve the first
ConnectedPropertyasAsset. - From that, retrieve the
UnifiedBitmap.UnifiedbitmapBitmapAssetPropertyString. - Set its value.
Guide to reproduce the solution:
- Open MaterialTexturePath.sln in Visual Studio.
- Reload references RevitAPI.dll, RevitAPIUI.dll and RevitAddinUtility.dll from your local folder (usually, where you have Revit installed).
- Build the project for the Revit version you want; works only for Revit 2018 and Revit 2019.
- Copy contents of the output folder to C:\ProgramData\Autodesk\Revit\Addins\<revit_version>.
- Copy the sample texture (new_texture.png file) to your desktop.
- Open the sample project.
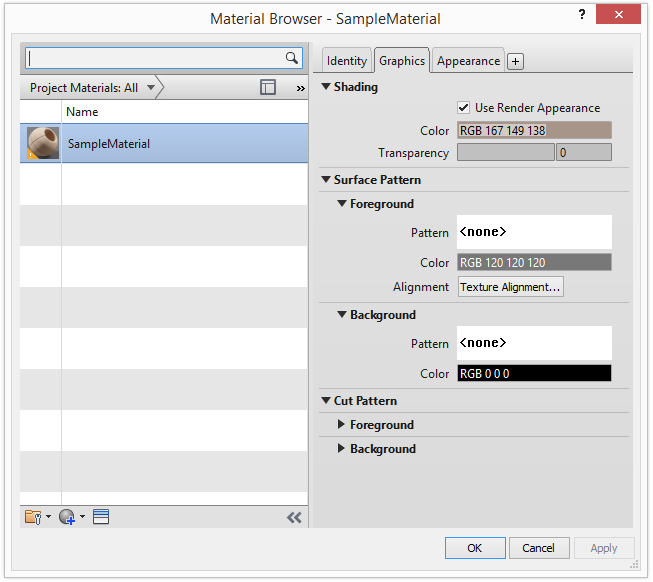
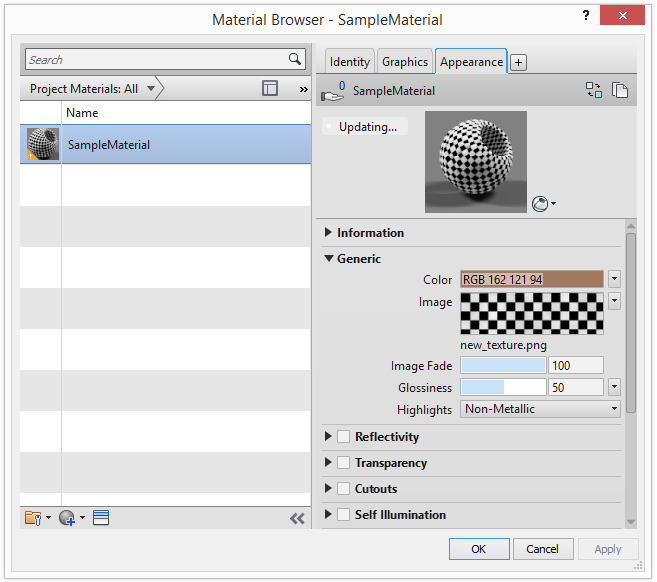
- Go to Manage/Materials and see the texture path in the only present material in the project.
- Navigate to the Add-Ins ribbon tab and click the Change texture path button.
- Go to Manage/Materials again and note that the texture path changed.
Test Run
Here are screen snapshots illustrating some of the steps from my test run:
Store the sample texture file on desktop:

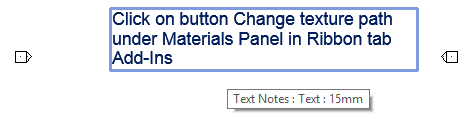
Open the sample model and observe the instructions:
The sample model contains one single sample material:
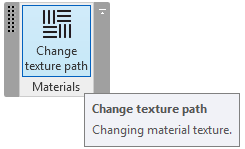
Click the sample command in its custom ribbon panel:
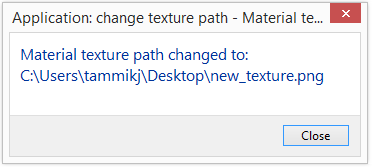
The add-in displays a message on completion:
The sample material texture is updated:
Many thanks to Lukáš for his research, putting together and documenting this sample so well!