Getting Two Different Kinds of Joined Elements
Revit loves creating and maintaining relationships, e.g. by joining elements and their geometry.
Here are a couple of element joining topics that we touched on in the past:
- AutoJoinElements
- Joined Beam Geometry Access
- Wall Joins and Geometry
- Move Duct Join Add-In with Video and GitHub Support
The user interface also includes functionality related to this and explicitly labelled Join Geometry:
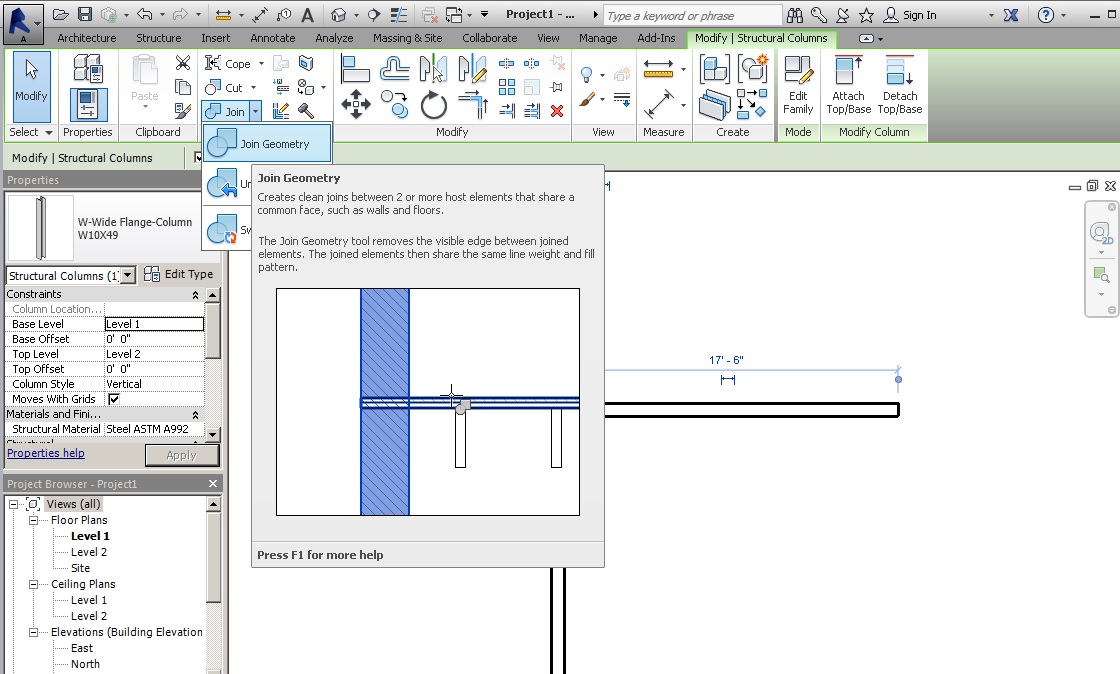
The same functionality uses slightly different nomenclature in the API, though, which might prove a bit confusing.
Here is a recent developer query to prove the point, with a nice clear answer by my colleague Akira Kudo:
Question: I am trying to use the JoinGeometryUtils.GetJoinedElements method with little success.
When passed in an existing element that has another element joined to it, the method still returns an empty collection.
However, if I right click one of the elements in the user interface and then 'Select Joined Elements', both elements are selected.
Answer: The GetJoinedElements method only returns elements that share a GeomJoin.
A GeomJoin is a pair-wise cut of geometry from one element to another.
To try this out, you can use the attached sample code and Revit model in JoinedElements1.zip, implementing the following external command:
  public Result Execute(
    ExternalCommandData commandData,
    ref string message,
    ElementSet elements )
  {
    UIApplication uiapp = commandData.Application;
    UIDocument uidoc = uiapp.ActiveUIDocument;
    Document doc = uidoc.Document;

    Reference ref1 = uidoc.Selection.PickObject(
      ObjectType.Element, "pick an element" );

    Element elem = doc.GetElement( ref1 );

    ICollection<ElementId> the_list_of_the_joined
      = JoinGeometryUtils.GetJoinedElements(
        doc, elem );

    System.Windows.Forms.MessageBox.Show(
      the_list_of_the_joined.Count.ToString() );

    uidoc.Selection.Elements.Clear();

    foreach( ElementId id in the_list_of_the_joined )
    {
      uidoc.Selection.Elements.Add(
        doc.GetElement( id ) );
    }
    return Result.Succeeded;
  }
As said, this is completely different from 'Select Joined Elements' in the user interface.
That UI functionality is available through the API via the LocationCurve.get_ElementsAtJoin method. It determines elements joined to the current one at the end of its location curve and also enables changing their joining behaviour and order.
You can try this out as well using the attached sample code and Revit model in JoinedElements2.zip, implementing this different external command:
Please also find the sample project in the JoinedElements2.zip.
  public Result Execute(
    ExternalCommandData commandData,
    ref string message,
    ElementSet elements )
  {
    UIApplication uiapp = commandData.Application;
    UIDocument uidoc = uiapp.ActiveUIDocument;
    Document doc = uidoc.Document;

    Reference ref1 = uidoc.Selection.PickObject(
      ObjectType.Element, "pick an element" );

    Element elem = doc.GetElement( ref1 );
    FamilyInstance fi = elem as FamilyInstance;
    LocationCurve lc = fi.Location as LocationCurve;

    uidoc.Selection.Elements.Clear();
    ElementArray startarray = lc
      .get_ElementsAtJoin( 0 ); // start

    foreach( Element elem1 in startarray )
    {
      uidoc.Selection.Elements.Add( elem1 );
    }

    ElementArray endarray = lc
      .get_ElementsAtJoin( 1 ); // end

    foreach( Element elem2 in endarray )
    {
      uidoc.Selection.Elements.Add( elem2 );
    }
    return Result.Succeeded;
  }
You should also check out the code provided by the Revit SDK sample ProximityDetection_WallJoinControl in the GeometryAPI subfolder.