Revit Database Exploration Tools and the Python Shell
I keep repeating the importance of being able to explore the Revit database model efficiently to understand what is going on.
This can even be important for end users, and is certainly much more so for developers.
The first and foremost important tool is obviously RevitLookup.
The BipChecker is less important and yet also handy for exploring element parameters.
The disadvantage of these two is that they only explore existing values provided by properties and parameters.
They do not offer much support for evaluating methods or exploring dynamically changing relationships.
This mostly requires active programming, e.g. in the Revit macro environment, or hard-core implementation and debugging of an external add-in.
It would be very nice to be able to interact directly with the Revit database using the API hands-on, interpreted, not compiled or packaged in a static macro.
Well, as we have mentioned several times, you can, twice over, using the Revit Python Shell or Revit Ruby Shell.
We look at the RevitPythonShell below, since we are not as knowledgeable in Ruby as in Python.
Personally, I would actually prefer the Ruby language to Python, though, for its more modern architecture.
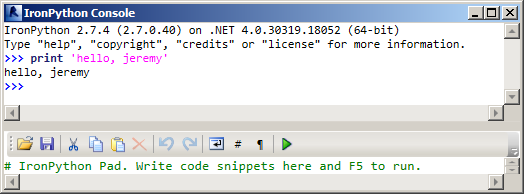
To run the tests described below, I downloaded and ran the installer for RevitPythonShell for Revit 2014 (r186) and the IronPython installer.
That was it, no further configuration of any kind required:
Alexander Ignatovich of Investicionnaya Venchurnaya Companiya very kindly describes in more detail how these tools can be used for highly efficient exploration and API testing in the Revit database:
Interactive Revit Database Exploration Using the Revit Python Shell
First of all, about RevitLookup. I don't know what to say about it, except I can't imagine my work without this tool now ;-)
I also explored its source, when I began to work with Revit API and needed to realize some functionality.
I use two good tools that let you not waste time waiting for Revit to load and some project you need to open or create:
- Revit Python Shell
- External Command Listener
These are fantastically effective for API exploration, testing some algorithm parts and preparing complex environment for your add-ins.
I mean, for example, creating thousands of family instances in your test.rvt, changing something that you cannot change manually through the interface, for example, extensible storages entities and so on.
I also created some lightweight tools that can point out some pieces of information about project or its specific elements, related to our products, which also cannot be extracted from the interface. They also help me provide product support.
The criteria for your choices depend only your own practice. I use the Python shell when the script code:
- Should not exceed 1/2 – 2/3 of the screen height.
- Should not use your own assemblies (yes, you can load assemblies and add references in your Python script, but our project contains multiple assemblies with dependences and sometimes they read their configuration files, so it's much quicker to create new project in Visual Studio and use External Command Listener to test some functionality).
- Should not react to Revit events, contains dynamic updaters or failure processing.
- Should prepare the environment for you. In this case the first rule can be ignored.
In other cases I use the External Command Listener (but again, it cannot be used if your code needs to react to events, use dynamic updaters or failure processing).
I like Python. Its syntax is very simple.
If you know any programming language, you can immediately write something on Python, even if all you ever read about it is here in this post.
I'll show some examples of scripts.
So, let's start to explore this tools. Start the extension, copy this script to console and press F5 (copy and paste the following code snippets somewhere or view source to see truncated lines in full):
print "Path:", doc.PathName
if doc.GetWorksharingCentralModelPath() != None:
  print "Central model path:", ModelPathUtils.ConvertModelPathToUserVisiblePath(doc.GetWorksharingCentralModelPath())
else:
  print "The project is not work-sharing"

print dir(uidoc)

for elem in selection:
  print elem, elem.Id
First of all, the script prints RVT path and the path of central file. Practically, it's the first useful lightweight tool in your arsenal. You can quickly copy RVT file and central model paths of an opened project.
Secondly, it prints a list of all properties and methods of Autodesk.Revit.UI.UIDocument, which is sometimes useful.
It uses the pre-defined variable uidoc to access the currently active UIDocument. It is defined like this:
uidoc = __revit__.ActiveUIDocument
The last thing shown in this simple example that I use in 95% of my scripts – iterating through the collection of selected elements.
There is absolutely no magic in the doc, uidoc and selection variables. If you click the Revit Python Shell "Configure..." command and open the InitScript tab, you'll see:
# these commands get executed in the current scope
# of each new shell (but not for canned commands)
import clr
clr.AddReference('RevitAPI')
clr.AddReference('RevitAPIUI')
from Autodesk.Revit.DB import *
from Autodesk.Revit.DB.Architecture import *
from Autodesk.Revit.DB.Analysis import *

uidoc = __revit__.ActiveUIDocument
doc = __revit__.ActiveUIDocument.Document
selection = list(__revit__.ActiveUIDocument.Selection.Elements)
...
This also provides an example of how to add additional references in your scripts, and the C# "using" keyword analogue.
The second very often useful thing is filtering elements from the model:
collector = FilteredElementCollector(doc)
linkedElements = collector
  .OfClass(RevitLinkType).ToElements()

for elem in linkedElements:
  efr = elem.GetExternalFileReference()
  print ModelPathUtils.ConvertModelPathToUserVisiblePath(
    efr.GetAbsolutePath())
  print "---------"
This is simple. Just notice that Python requires no "new" keyword.
So we created a filtered element collector for our opened document, retrieved all RevitLinkType elements and iterated through the elements list.
Let's go deeper and see something more complicated.
Some months ago I needed to prepare some model elements information, grouped by worksets. Back in those fabled times I didn't know how to do it :-)
I noticed that elements in the model have a "work set" parameter, so I selected an element, executed the RevitLookup "Snoop current selection..." command, went to the parameters field, found "work set" parameter, noticed that it has integer value, went to it's definition and found out that its built-in parameter name is ELEM_PARTITION_PARAM.
I deduced that if we get all worksets from model, we can get their elements by using an ElementParameterFilter.
At this point, I went to The Building Coder, searched it for "document workset table" and found the post on the workset API.
I learned that I should use a FilteredWorksetCollector. So let's try:
worksets = FilteredWorksetCollector( doc )
worksets.OfKind( WorksetKind.UserWorkset );

for elem in worksets:
  print elem.Name
We got it! They are not sorted, but remember, we are only exploring to find a way to solve the problem, and it is not the production code.
So, continuing to explore how to retrieve the elements from the model that belong to a specific workset.
Let's write a function that filters elements for a specific workset.
The filtered element "work set" parameter should be equal to the Workset.Id.Integer value. We'll pass it to the function as wId:
def FindElementsByWorkset(wId):
  worksetI = int(BuiltInParameter.ELEM_PARTITION_PARAM) # convert enumeration element to an integer
  worksetE = ElementId(worksetI) # and create element id from it

  provider = ParameterValueProvider(worksetE) # the parameter should be BuiltInParameter.ELEM_PARTITION_PARAM
  evaluator = FilterNumericEquals() # the value should be equal
  rule = FilterIntegerRule(provider, evaluator, wId) # to wId

  parafilter = ElementParameterFilter(rule); # create filter parameter
  collector = FilteredElementCollector(doc) # create collector
  collector.WherePasses(parafilter) # and filter elements

  # iterate through the elements
  for elem in collector:
    print "\t", elem.Id, elem.GetType().Name
This function should be placed before our previous code that retrieves the worksets from the model.
The last thing is to invoke our function in a loop:
for elem in worksets:
  print elem.Name
  FindElementsByWorkset(elem.Id.IntegerValue)
As you can easily imagine, I would have spent much more time if I were forced to restart Revit every time I changed something in this code analogue.
The advantages of using this kind of tools are completely obvious, aren't they?
The remaining examples will cover some non-obvious things, that you would need to search for, when you face them. And you will face them :-)
These things include GUIDs and generic methods. This example shows using such things. It finds an extensible storage schema with a specific name, gets doc.OwnerFamily entity of the schema found and retrieves the "FamilyId" field of Guid type.
from Autodesk.Revit.DB.ExtensibleStorage import *
from System import Guid # you need to import this, when you work with Guids!
for sch in Schema.ListSchemas():
  if sch.SchemaName == "CatalogFamilyInfoEntity": # looking for the schema
    schema = sch
print schema.SchemaName
entity = doc.OwnerFamily.GetEntity(schema)
print entity.IsValid()
print entity.Get[Guid]("FamilyId") # generic method public FieldType Get FieldType (string fieldName)
Another non-obvious thing is creating a new Guid for something. If you already know your Guid value, you may use something like this:
import System
parameterId = System.Guid("0ce6f957-070e-4e1b-8f33-7a9d95cf1142")
print "parameter", doc.ProjectInformation.get_Parameter(parameterId).AsString() # I've got shared parameter with this id in the RVT file, you should use your own Guid
If you want to create an absolutely new Guid:
from System.Guid import NewGuid
print NewGuid()
The (almost) last example shows how to automatically create thousands of family instances of different family types of a specific family. The code is not very good, but it is not the production, it's only for me and I seldom use it. This script will create a layer of rng * rng family instances for each family symbol of specific family:
collector = FilteredElementCollector(doc)
collector.OfCategory(BuiltInCategory.OST_StructuralFraming) # my family in this category, just remove this or change to the category of family you want to place in the document
elems = collector.OfClass(FamilySymbol).ToElements() # we get all family symbols in this category

rng = 80 # 80*80 elements of each family symbol
dist = 5 # distance between elements

t = Transaction(doc, 'Create multiple family instances.')
t.Start()

z = 0
for elem in elems:
  if elem.Family.Name == "Enter your family name here":
    for i in range(0,rng):
      for j in range(0,rng):
        loc = XYZ((i*dist),(j*dist),(z*dist))
        familyInst = doc.Create.NewFamilyInstance(loc, elem, Structure.StructuralType.NonStructural)
    z = z + 1

t.Commit()
Let's end with one additional Python script that demonstrates working with LINQ and enumerations:
from System import *
clr.AddReference("System.Core")
from System.Collections.Generic import *
import System
clr.ImportExtensions(System.Linq)
from System.Linq import Enumerable

def printSubCategories(elem, n):
  tab = ""
  for i in range(1, n):
    tab = tab + "\t"
  print tab, elem.Name, Enum.ToObject(BuiltInCategory, elem.Id.IntegerValue), elem.Id
  for child in elem.SubCategories:
    printSubCategories(child, n + 1)

for elem in Enumerable.ToList[Category](doc.Settings.Categories).OrderBy(lambda x: x.Name):
  print elem.Name, Enum.ToObject(BuiltInCategory, elem.Id.IntegerValue), elem.Id
  printSubCategories(elem, 1)
  print "---"
Very many thanks to Alexander for these nice examples!
I hope that everybody takes this chance to really dig deep into intimate direct API interaction with Revit.