C++ Revit Add-In
To my great surprise, I recently discovered that I have never yet published anything at all on implementing a Revit add-in in C++.
That is way overdue, so here goes, a step by step description of setting up a C++ project to implement a Revit 2011 external command add-in.
It is very similar to setting up a C# or VB Revit add-in project, similar to the steps described for a C# or VB Revit add-in for Revit 2009 way back in September 2008, and more up-to-date in the Revit DevTV recordings, except we specify C++ instead of C# or VB.
Another detailed step by step description for C# is provided in the Revit SDK developer guide "Revit 2011 API Developer Guide.pdf", in the Chapter 2.2 Walkthrough: Hello World.
So here we go doing the same for C++:
1. In Visual Studio 2008, select File > New > Project... > Visual C++ > Class Library. Define the project location and name, e.g. 'HelloRevitCpp' and click OK:
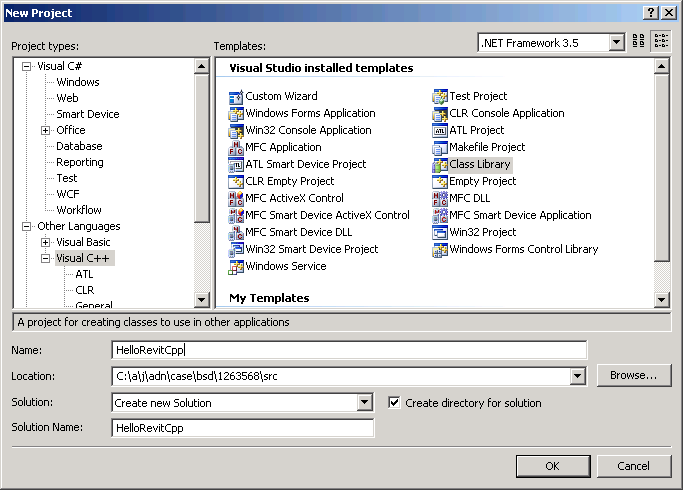
This generates a number of files:
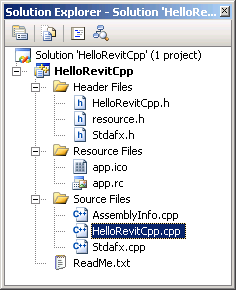
2. Rename the class that we will to use to implement the external command to 'Command', as done in many of the Revit SDK samples. Here is the header file defining the command class implementation:
// HelloRevitCpp.h

#pragma once

using namespace System;

namespace HelloRevitCpp {

  public ref class Command
  {
    // TODO: Add your methods for this class here.
  };
}
3. Add references to the Revit API assemblies via Solution Explorer > HelloRevitCpp > Properties > Common Properties > Framework and References:
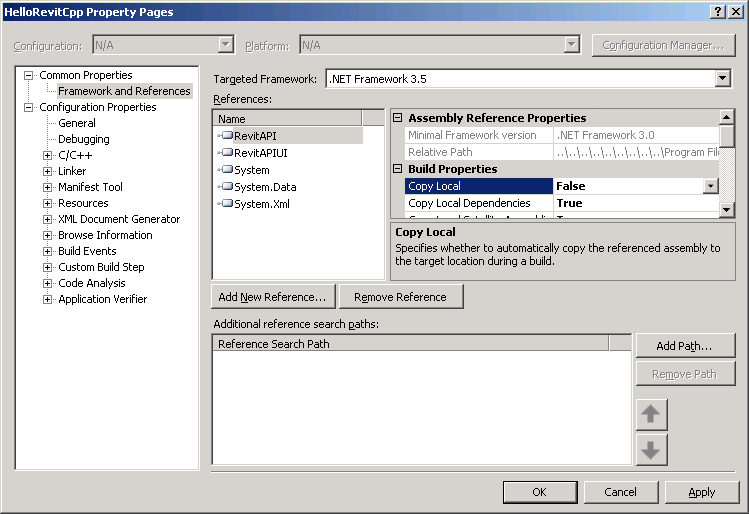
Don't forget to set the Copy Local flag to False, just like for C# and VB!
4. I prefer not placing any 'using' statements whatsoever in my header files, so I removed the automatically generated 'using namespace System' from HelloRevitCpp.h.
In the header file, I use full namespace prefixes for all referenced objects.
I need to:
- Derive the external command implementation from the Revit IExternalCommand interface.
- Add the transaction mode and regeneration option.
- Define the external command Execute method.
- Specify the full namespace prefix for all objects.
The resulting header file ends up looking like this:
// HelloRevitCpp.h

#pragma once

namespace HelloRevitCpp {

  [Autodesk::Revit::Attributes::Transaction(
    Autodesk::Revit::Attributes::TransactionMode::Automatic)]

  [Autodesk::Revit::Attributes::Regeneration(
    Autodesk::Revit::Attributes::RegenerationOption::Manual)]

  public ref class Command
    : Autodesk::Revit::UI::IExternalCommand
  {
  public:
    virtual Autodesk::Revit::UI::Result Execute(
      Autodesk::Revit::UI::ExternalCommandData^ commandData,
      System::String^% message,
      Autodesk::Revit::DB::ElementSet^ elements);
  };
}
5. Implement the external command class.
I do this in the HelloRevitCpp.cpp module. Here I include all the using statements to avoid specifying the full namespace prefixes.
The resulting code for a minimal implementation doing absolutely nothing at all looks like this:
// HelloRevitCpp.cpp - this is the main DLL file.

#include "stdafx.h"
#include "HelloRevitCpp.h"

using namespace System;
using namespace Autodesk::Revit::ApplicationServices;
using namespace Autodesk::Revit::Attributes;
using namespace Autodesk::Revit::DB;
using namespace Autodesk::Revit::UI;

using namespace HelloRevitCpp;

Result Command::Execute(
  ExternalCommandData^ commandData,
  String^% message,
  ElementSet^ elements )
{
  return Autodesk::Revit::UI::Result::Succeeded;
}
6. To load this into Revit and test it, I need to create an add-in manifest. Here is an overview of various add-in manifest topics.
The add-in manifest for my C++ application (with the full path abbreviated) looks like this:
<?xml version="1.0" encoding="utf-8"?>
<RevitAddIns>
  <AddIn Type="Command">
    <Text>Hello Revit C++</Text>
    <Description>My first C++ Revit add-in</Description>
    <Assembly>C:\...\HelloRevitCpp.dll</Assembly>
    <FullClassName>HelloRevitCpp.Command</FullClassName>
    <ClientId>be7f62ce-d5d0-4b3b-9298-327c2c6d22f4</ClientId>
  </AddIn>
</RevitAddIns>
I need to copy it to the appropriate location for Revit to pick it up, in my case
C:\Documents and Settings\All Users\Application Data\Autodesk\REVIT\Addins\2011
C:\a\doc\revit\blog\ > copy
  C:\a\j\adn\case\bsd\1263568\src\HelloRevitCpp\HelloRevitCpp\HelloRevitCpp.addin
  "C:\Documents and Settings\All Users\Application Data\Autodesk\REVIT\Addins\2011"
    1 file(s) copied.
7. I set up Revit.exe as the debugging application:
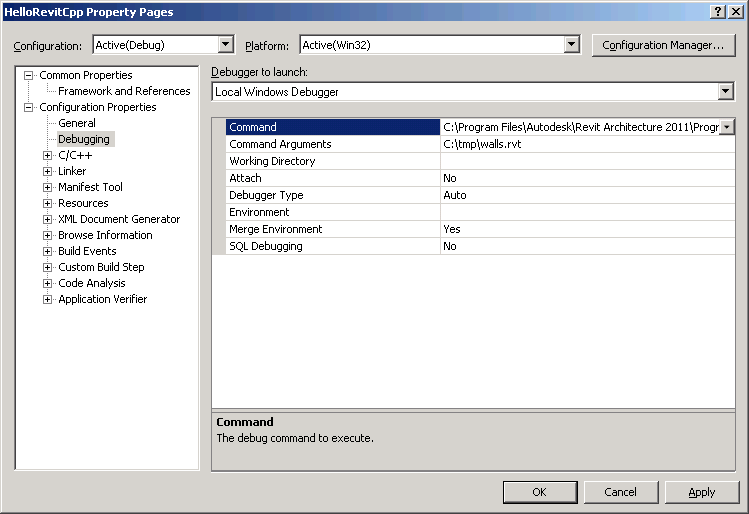
Now I can simply hit F5 in Visual Studio to start debugging, which launches Revit.
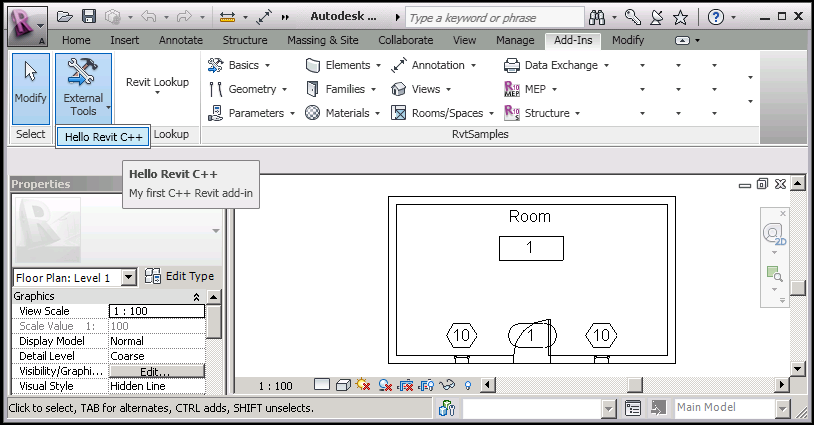
In Revit, I can launch my external command from Add-Ins > External Tools > Hello Revit C++:
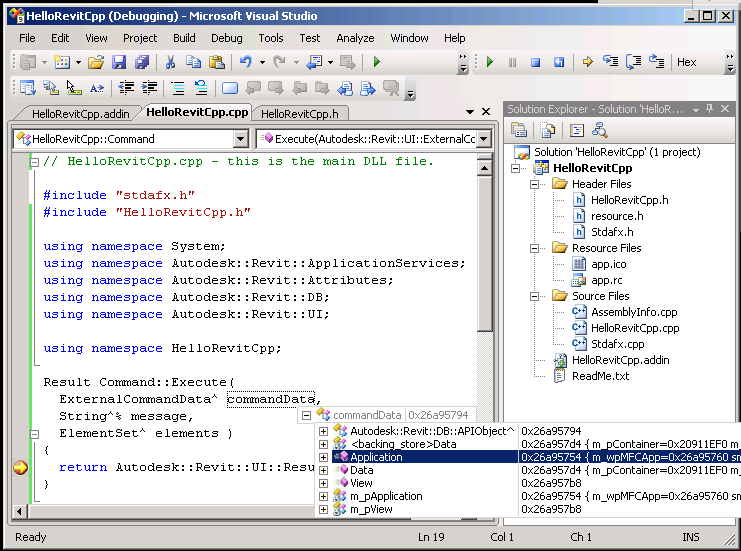
Before actually launching the command, I set up a breakpoint in the Visual Studio debugger on the return statement of the Execute command.
When the command is launched, the breakpoint is hit and I can examine the contents of the command data argument passed in to my command:
That's it for now. Easy-peasy. Hope this helps.
Here is HelloRevitCpp.zip containing the complete source code, Visual Studio solution, and add-in manifest file.