Get Type Id and Preview Image
It seems like there is an infinite amount of new functionality in the Revit 2011 API.
Here is another little item that I was not aware of before, even though it is listed clearly in the What's New section of the Revit API help file RevitAPI.chm, which says:
The new method ElementType.GetPreviewImage extracts the preview image of an Element Type. This image is similar to what is seen in the Revit UI when selecting the type of an element. You can specify the size of the image in pixels.
Extract image of an ElementType
Here is a question that deals with retrieval of the preview image and also the use of the new Element.GetTypeId method, which returns the element id of the given element's type. That obviously only makes sense for an element that has a type assigned to it, for instance a family instance.
Question: I am trying to use the ElementType.GetPreviewImage method. I doing so, I also ran into an issue with the Element.GetTypeId method. Do you have a sample of using these two methods?
Answer: These two methods do not necessarily have anything to do with each other per se, but it is of course possible to grab all family instances in the model, ask each for its element type using GetTypeId, and then ask the element type for its preview image. In case you are confused about the relationships of families, symbols and instances: a family is a collection of types. In the Revit 2011 API, they are represented by the ElementType class, which is a super class for all kinds of element types, and its subclass FamilySymbol, which specifically represents an element type that comes from a family. The ElementType class used to be named Symbol in previous versions of the API.
When you insert an instance of a symbol into the model, it is represented by a family instance object. You can have many instances making use of the same element type, e.g. eight chairs or a hundred windows of the same type.
The Element.GetTypeId method returns the element id of the given element's type, if that makes any sense for the given element. This does make sense for family instances.
To demonstrate the use of the GetTypeId and GetPreviewImage methods, I implemented a new external command CmdPreviewImage in The Building Coder sample project, which does the following:
- Retrieve all family instances using a filtered element collector.
- Query each instance for its element type using GetTypeId.
- Query each type for its preview image using GetPreviewImage.
- Encode the returned bitmap into JPEG format, store it in an external file, and display it to the user.
I had to add two new references to the PresentationCore and WindowsBase .NET assemblies to gain access to some .NET image processing functionality. The following helper method makes use of this to convert a Bitmap instance to a BitmapSource:
static BitmapSource ConvertBitmapToBitmapSource(
  Bitmap bmp )
{
  return System.Windows.Interop.Imaging
    .CreateBitmapSourceFromHBitmap(
      bmp.GetHbitmap(),
      IntPtr.Zero,
      Int32Rect.Empty,
      BitmapSizeOptions.FromEmptyOptions() );
}
The command class is defined using a read-only transaction mode and a manual regeneration option, since no changes are applied to the model:
  [Transaction( TransactionMode.ReadOnly )]
  [Regeneration( RegenerationOption.Manual )]
Here is the command mainline code from the Execute method:
UIApplication uiapp = commandData.Application;
UIDocument uidoc = uiapp.ActiveUIDocument;
Document doc = uidoc.Document;

FilteredElementCollector collector
  = new FilteredElementCollector( doc );

collector.OfClass( typeof( FamilyInstance ) );

foreach( FamilyInstance fi in collector )
{
  Debug.Assert( null != fi.Category,
    "expected family instance to have a valid category" );

  ElementId typeId = fi.GetTypeId();

  ElementType type = doc.get_Element( typeId )
    as ElementType;

  Size imgSize = new Size( 200, 200 );

  Bitmap image = type.GetPreviewImage( imgSize );

  // encode image to jpeg for test display purposes:

  JpegBitmapEncoder encoder
    = new JpegBitmapEncoder();

  encoder.Frames.Add( BitmapFrame.Create(
    ConvertBitmapToBitmapSource( image ) ) );

  encoder.QualityLevel = 25;

  string filename = "a.jpg";

  FileStream file = new FileStream(
    filename, FileMode.Create, FileAccess.Write );

  encoder.Save( file );
  file.Close();

  Process.Start( filename ); // test display
I ran this command in the following minimal sample model with a wall with a door, a window and an opening in it:
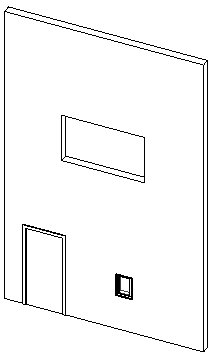
It therefore includes just two family instances, one each for the door and the window, and displays one 200 x 200 image for each for them, just as we requested:
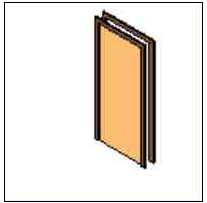
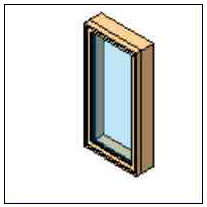
On my system, the call to Process.Start pops up the Windows fax and picture viewer for each preview image it displays.
If you do not want to see the same image repeated multiple times for a type that is reused repeatedly in the model, you could add a check to skip ids of duplicate element types in the loop. You could also name each image file individually, for instance using the type name or other data. I did not add that here to keep the code as simple as possible to highlight the main principles.
Here is version 2011.0.66.0 of The Building Coder sample source code and Visual Studio solution including the new command.
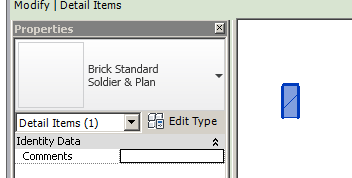
Addendum: In answer to Paul's comment below, Harry Mattison points out that Revit does not have preview images for detail components. For instance, here is an example of brick detailing, which displays no preview in the user interface:
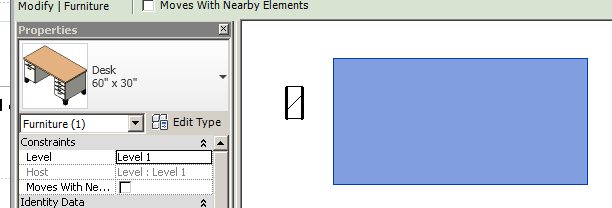
Model objects such as a desk, on the other hand, display the preview image when selected:
