FindReferencesByDirection
This is part 9 of Scott Conover's AU 2009 class on analysing building geometry, dealing with the FindReferencesByDirection method and its use as an applications 'eyes'.
We mentioned the method briefly in our discussions on how to find a host or a foundation element, Harry Mattison recently presented a very compelling example using it to simulate a pool table in a Revit model, and Scott himself provided the real-world example for creating spot elevations on the top surface of a beam which we discussed yesterday. The Revit 2010 SDK Samples AvoidObstruction and RaytraceBounce also both demonstrate its use.
Here and now Scott presents more background information and several additional working examples proving how powerful and useful it can be for other real-world tasks.
FindReferencesByDirection
This new method introduced in Revit 2010 allows you to use Revit's picking tools to find elements and geometry. With this method, a ray is projected from a point in a specified direction. The geometry that is hit by the ray is returned by the method. Look at its description in the Revit API help. Here are some additional notes:
- The method intersects 3D geometry only and requires a 3D view as input. It is possible to use a 3D view which has been cut by a section box, or which has view-specific geometry and graphics options set, to find intersections which would not be found in the uncut and uncropped 3D model.
- This method finds both elements and geometric references which intersect the ray. Some element references returned will not have a corresponding geometric object which is also intersected (for example, rays passing through openings in walls will intersect the wall and the opening element). If you are interested only in true physical intersections you should discard all references whose GeometryObject is of type Element, leaving behind only intersections with faces.
- References will be found and returned only for elements that are in front of the ray. (This is a contradiction to the note in the 2010 documentation, which states that negative results are possible; they are not).
- This method will not return intersections in linked files.
- This method will not return intersections with elements which are not in the active design option.
Find Elements Near Elements
One major use for this tool is to find elements in close proximity to other elements. This allows you to use the tool as your application's 'eyes' and determine relationships between elements which don't have a built-in relationship already.
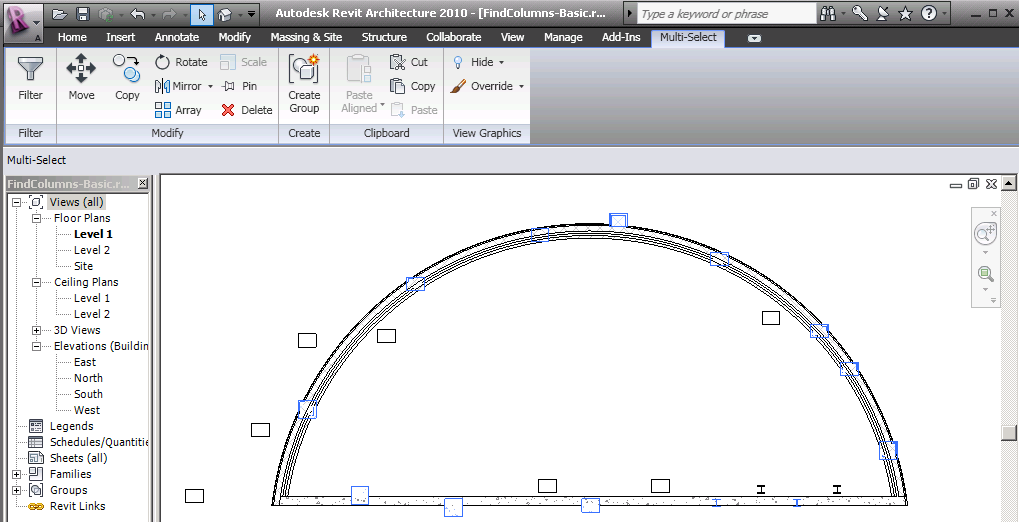
Example: Find Columns Embedded in Walls
In this example, we use the ray-tracing capability to find columns embedded in walls. As columns and walls don't maintain a relationship directly, this utility allows us to find potential candidates by tracing rays just outside the extents of the wall, and looking for intersections with columns. The implementation covers flat walls (where only two rays, one for either side, are necessary), as well as curved walls, where the rays are traced tangent to the walls at incremental distances, and only matches in close proximity are accepted.
Measure distances
The results of the FindReferencesByDirection are an array of Reference objects intersected by the ray. When the References are obtained from this method, the References' ProximityParameter will be set.
This is the distance between the origin of the ray and the intersection point. You can use this distance to exclude items too far from the origin for a particular geometric analysis. You can also use this distance to take on some interesting problems involving analyzing the in place geometry of the model.
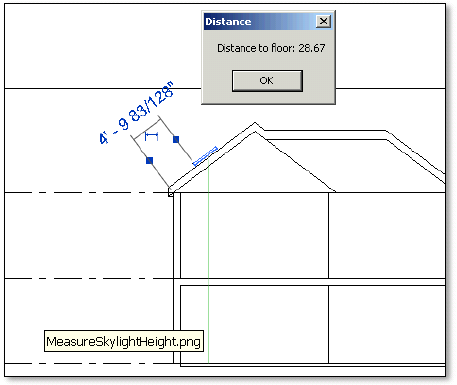
Example: Measure Distance with FindReferencesByDirection
In this example, we measure the vertical distance from a skylight to a preselected floor. Yes, this could be obtained through geometric tools as well (Face.Project()), but with the ray-tracing tool, we don't have to examine the floor to find its top face(s), nor deal with sloped slabs or other problematic details. We just look at all the intersections with the floor, pick the closest one, and thus have found our distance and intersection point.
Ray bouncing analysis
The references returned by FindReferencesByDirection also include the intersection point on the geometry. Knowing the intersection point on the face, the face's material, and the ray direction allows you analyze reflection and refraction within the building. This is illustrated by the Revit SDK sample RayTraceBounce, which is used to track a ray bouncing off the walls of an enclosed space:

Please refer to Scott's AU class material for the full source code of his sample project defining the column intersection and distance measurement implementations.
We are nearing the end of this series. What an impressive amount of new content Scott packed into that one presentation! The next and last intalment of this series deals with material quantity extraction.